DIY Shiplap Fireplace: Step By Step Guide

Also Seen on my other website www.thebestofhome.com here.
Shiplap is a popular design element that has been around for centuries. In recent years, it has seen a resurgence in popularity as a way to add texture and interest to walls and other surfaces. One area where shiplap can make a big impact is around a fireplace. With a few tools and a bit of patience, you can transform your fireplace into a stunning focal point in your living room. In this blog post, I'll guide you through the process of a DIY shiplap fireplace, and how I transformed my builder grade fire place to what you see in the picture above!
Materials and supplies needed:
Shiplap boards (I recommend using pre-primed MDF or pine). I used theses ones here.
2x4 boards for framing
Baseboards to match current boards if applicable
Miter Saw (mine linked here) and/or Table Saw (mine linked here)
Brad nailer (mine linked here) or hammer and nails
Screw Driver (mine linked here)
Wood screws
Stud Finder
Utility Knife
Wood filler
Caulk
Sandpaper (120 grit and 220 grit)
Primer (if you buy boards not already primed)
Paint
Paint roller, brushes or Paint Sprayer
Drop cloths
Painter's tape
Level
Safety goggles
Step 1: Plan and Measure
Before starting any project, it’s important to plan and measure carefully. Consider the size and shape of your fireplace, and how much shiplap you’ll need to cover the area. Measure the height and width of the wall surrounding the fireplace, as well as the distance from the floor to the mantel. Sketch out a rough design of the shiplap pattern you’d like to use.
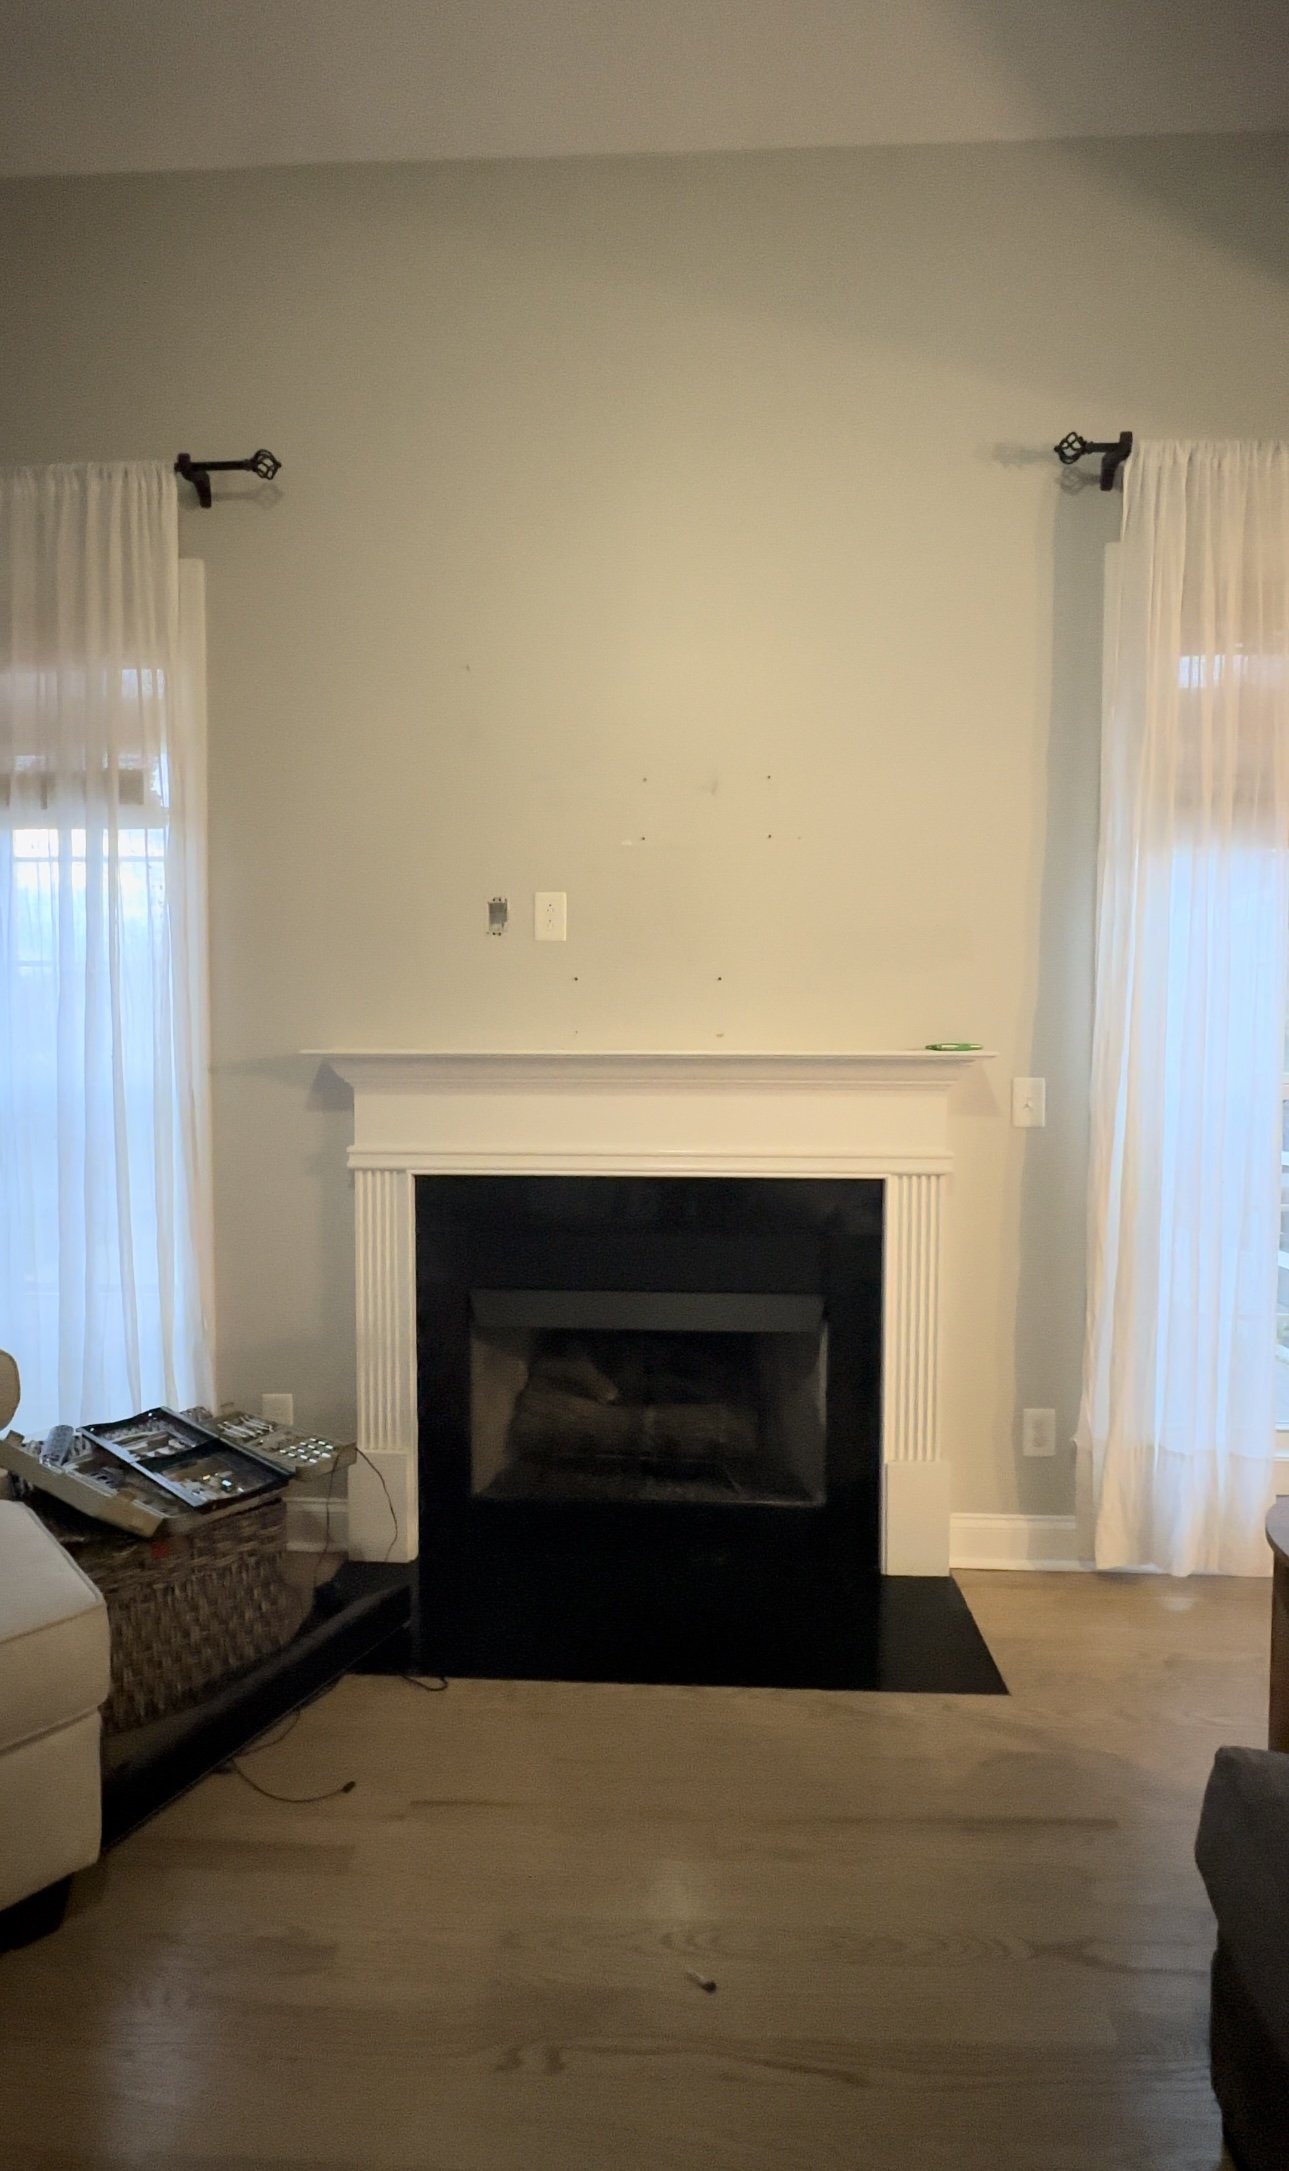
My Fireplace before
Step 2: Remove existing fireplace
If you have an existing fireplace, you’ll need to remove any trim, mantel, or other decorations before installing the shiplap. If you’re building a new fireplace, or building around current one, be sure to build a frame out of 2x4s. For a new fireplace, make sure to cover the frame with fireproof material, such as cement board, and add any necessary venting. If you have a builder grade fireplace that was already there, like I did, use a utility knife and work your way around until you can pop the existing fireplace out, from there, if you want to add dimension, you can build a frame around like I did.
**Important note: Make sure you look up your local fireplace code requirements before installing any combustible material around. The National Fire Code requires all combustible material to be at least 6 inches from the opening of the firebox unless you have a zero clearance fireplace. Zero clearance means the fireplace has its own insulation and it needs zero inches of clearance (distance) from combustible materials in the home. Basically a zero clearance fireplace is a self-contained firebox that is designed to be installed almost anywhere in your home**
My fireplace is zero clearance and gas, however, I did still install framing 6 inches from the box opening.
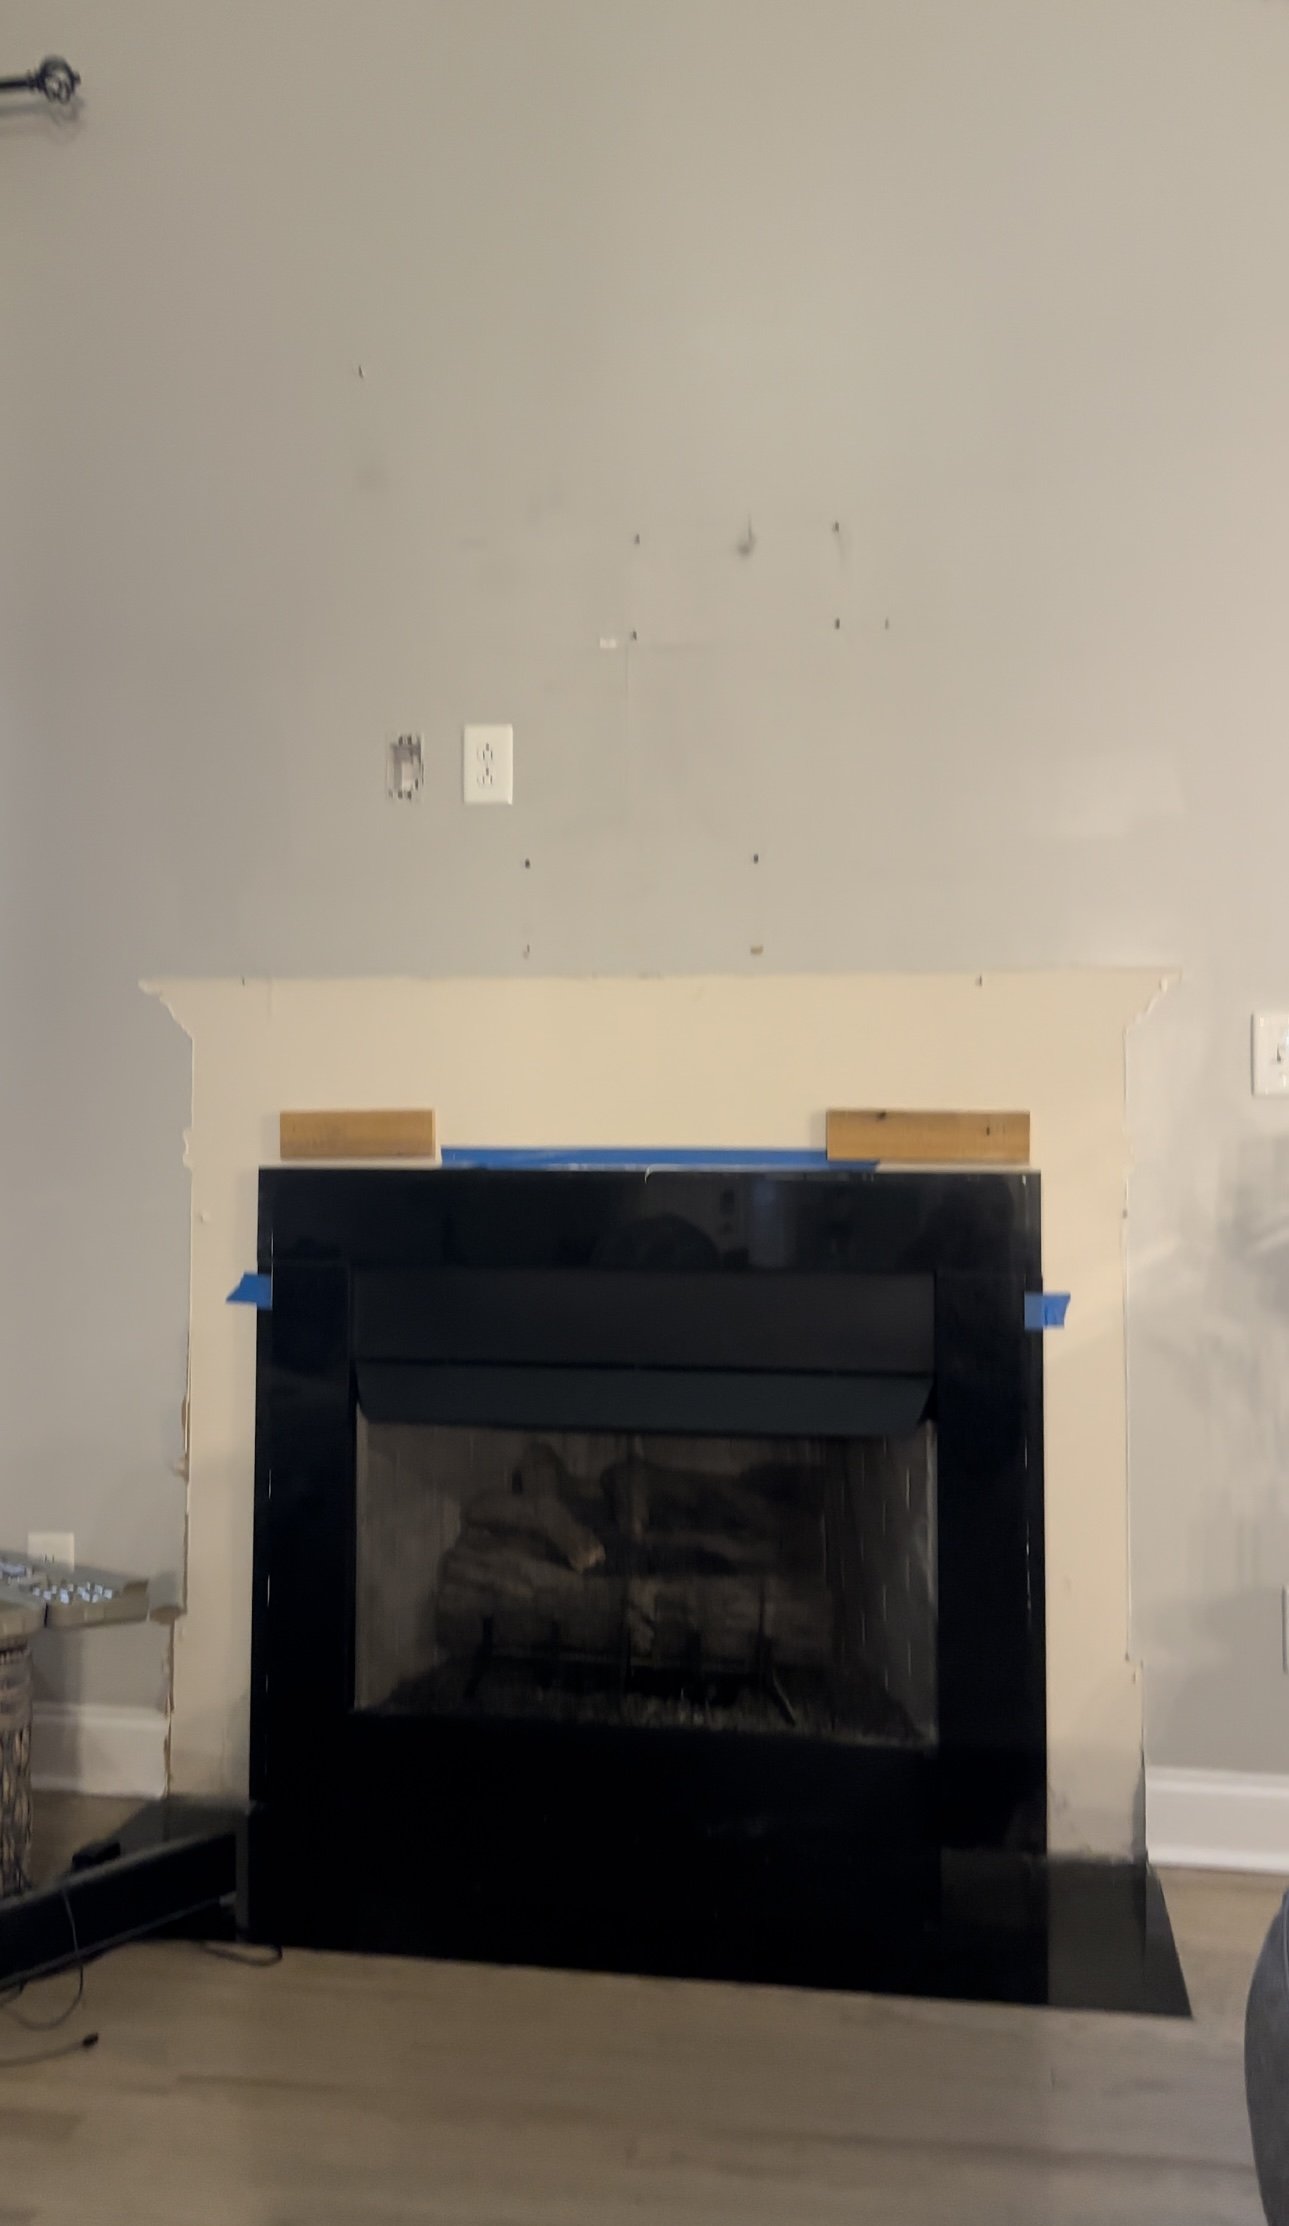
After I took the mantle off.
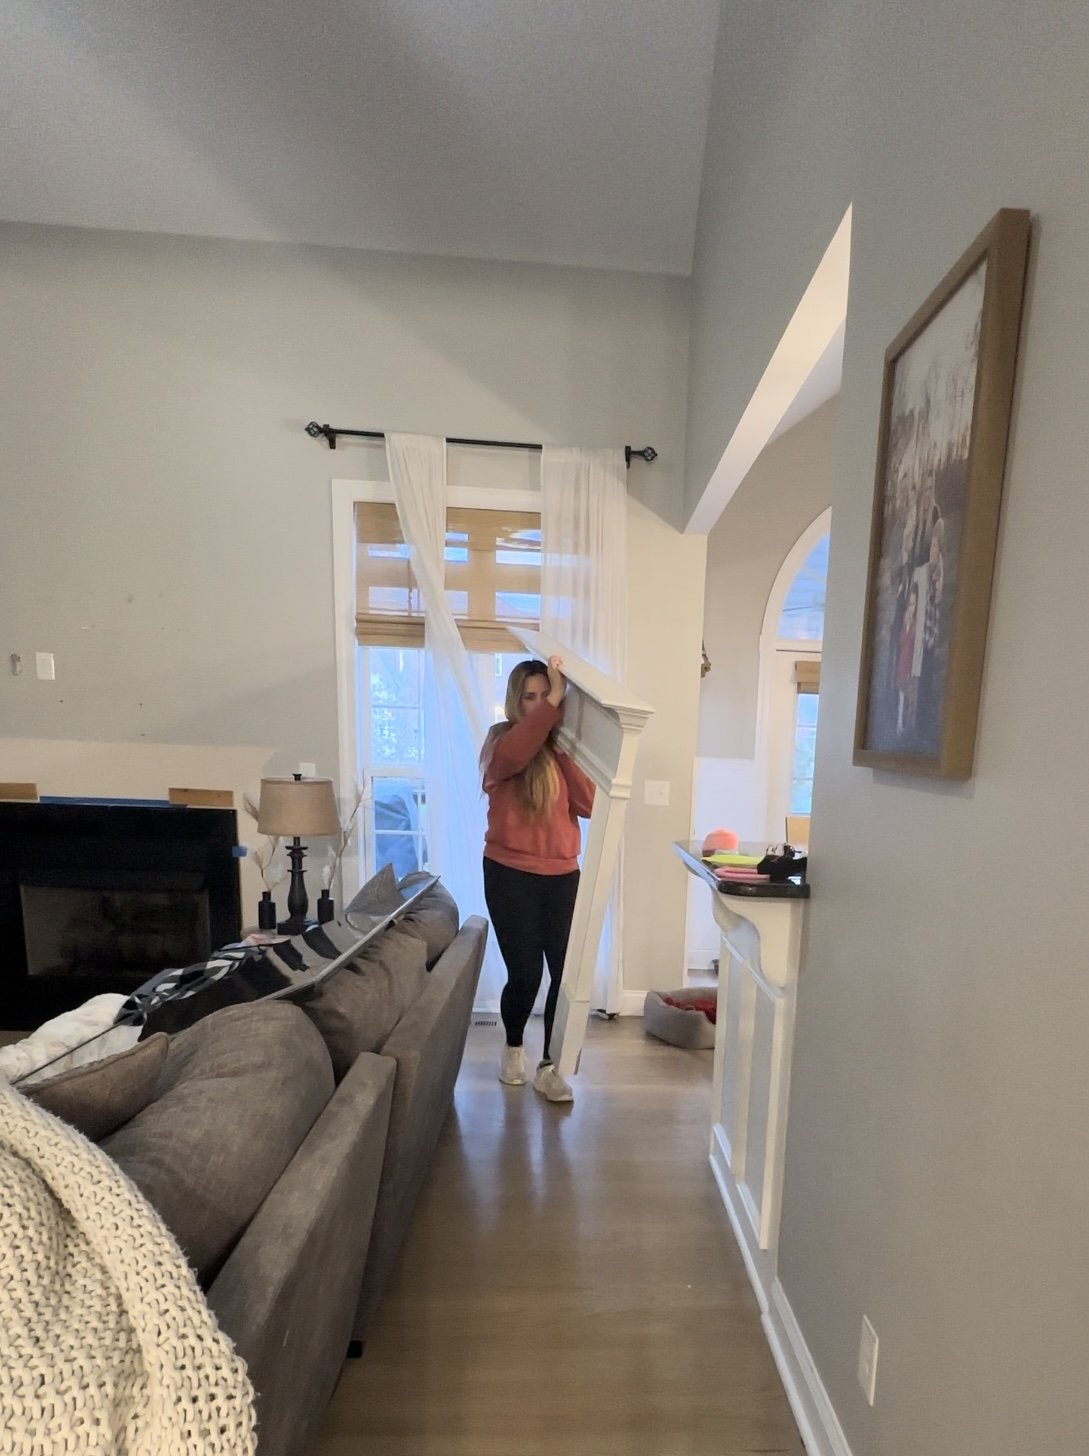
Mine was one piece, so it was easier to remove after I worked my way around it with my utility knife.
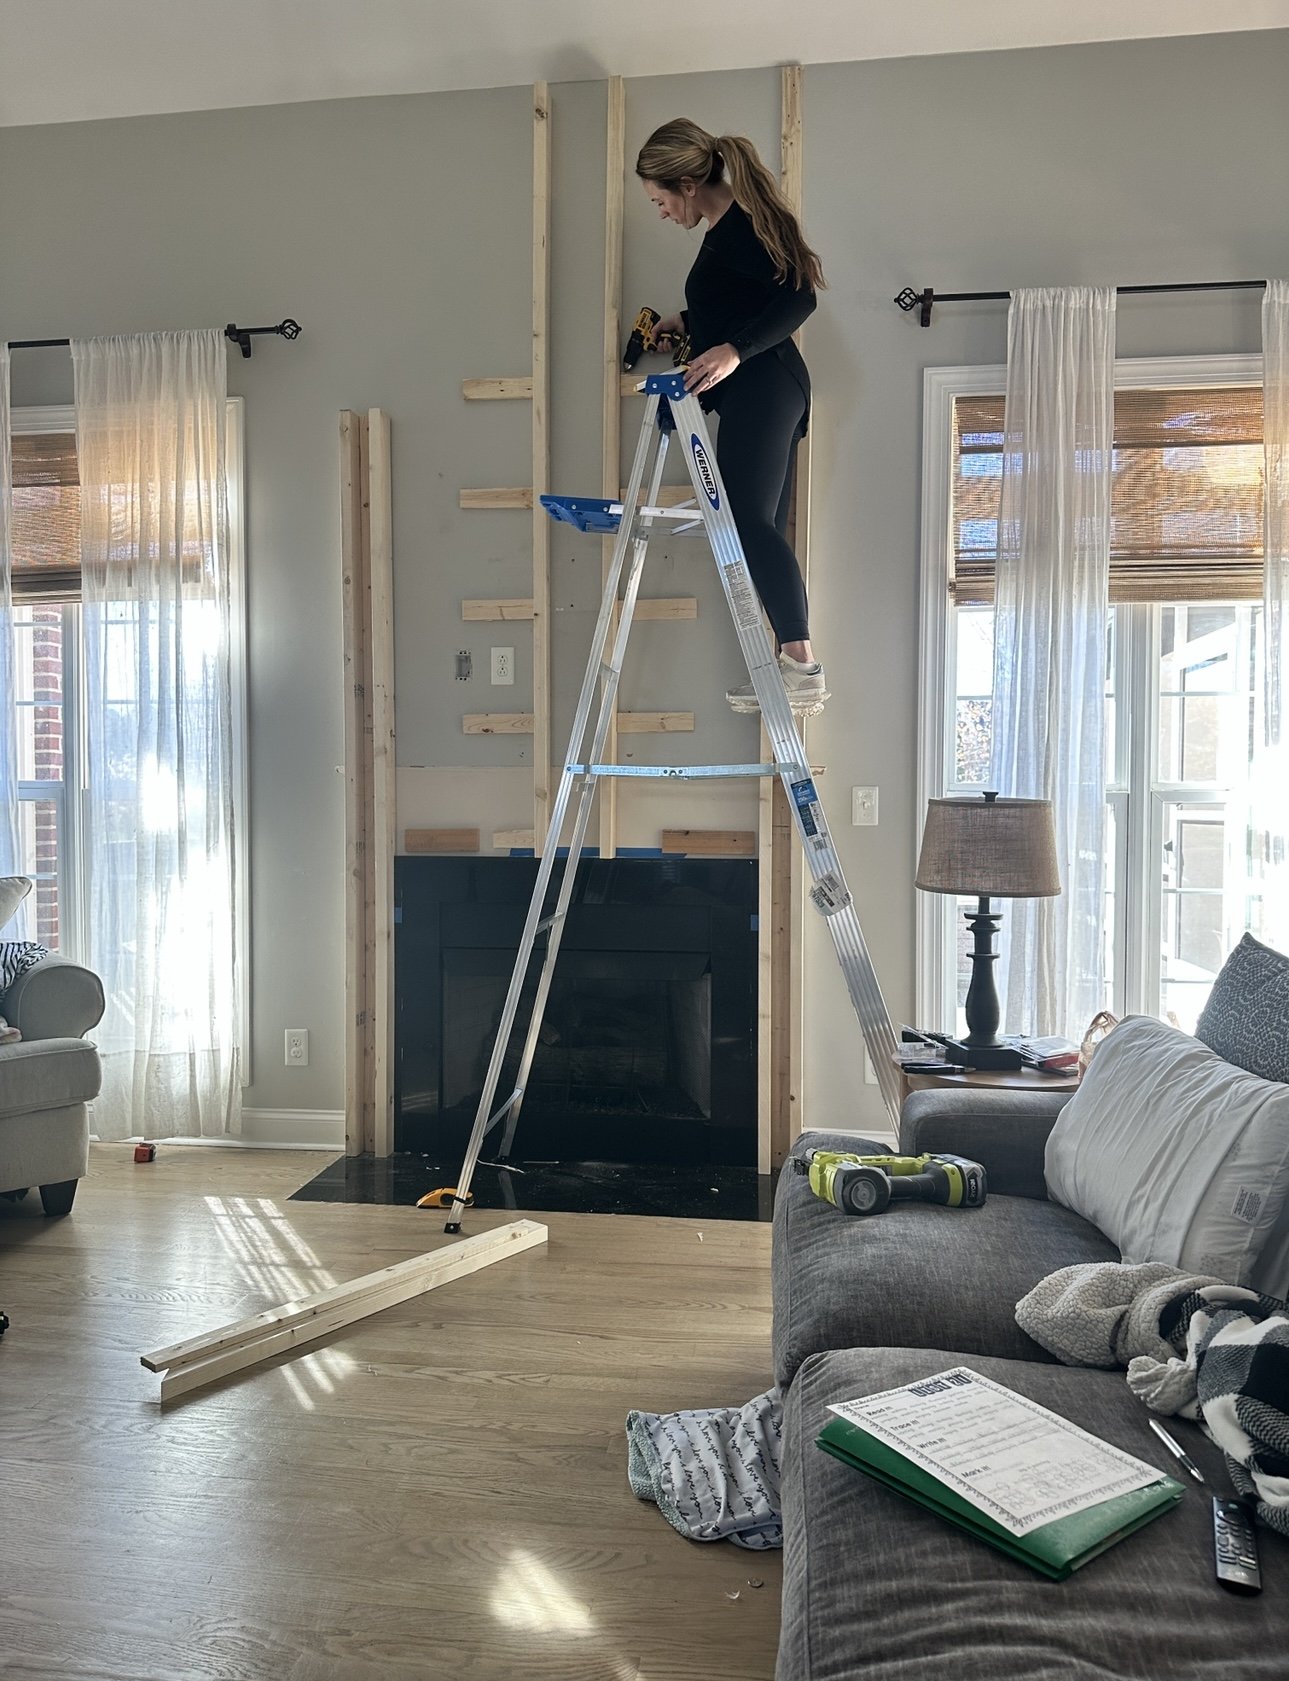
Step 3: Build Stud Wall
Build around existing fireplace opening. (Make sure you look up your city code for how far of an opening you need).
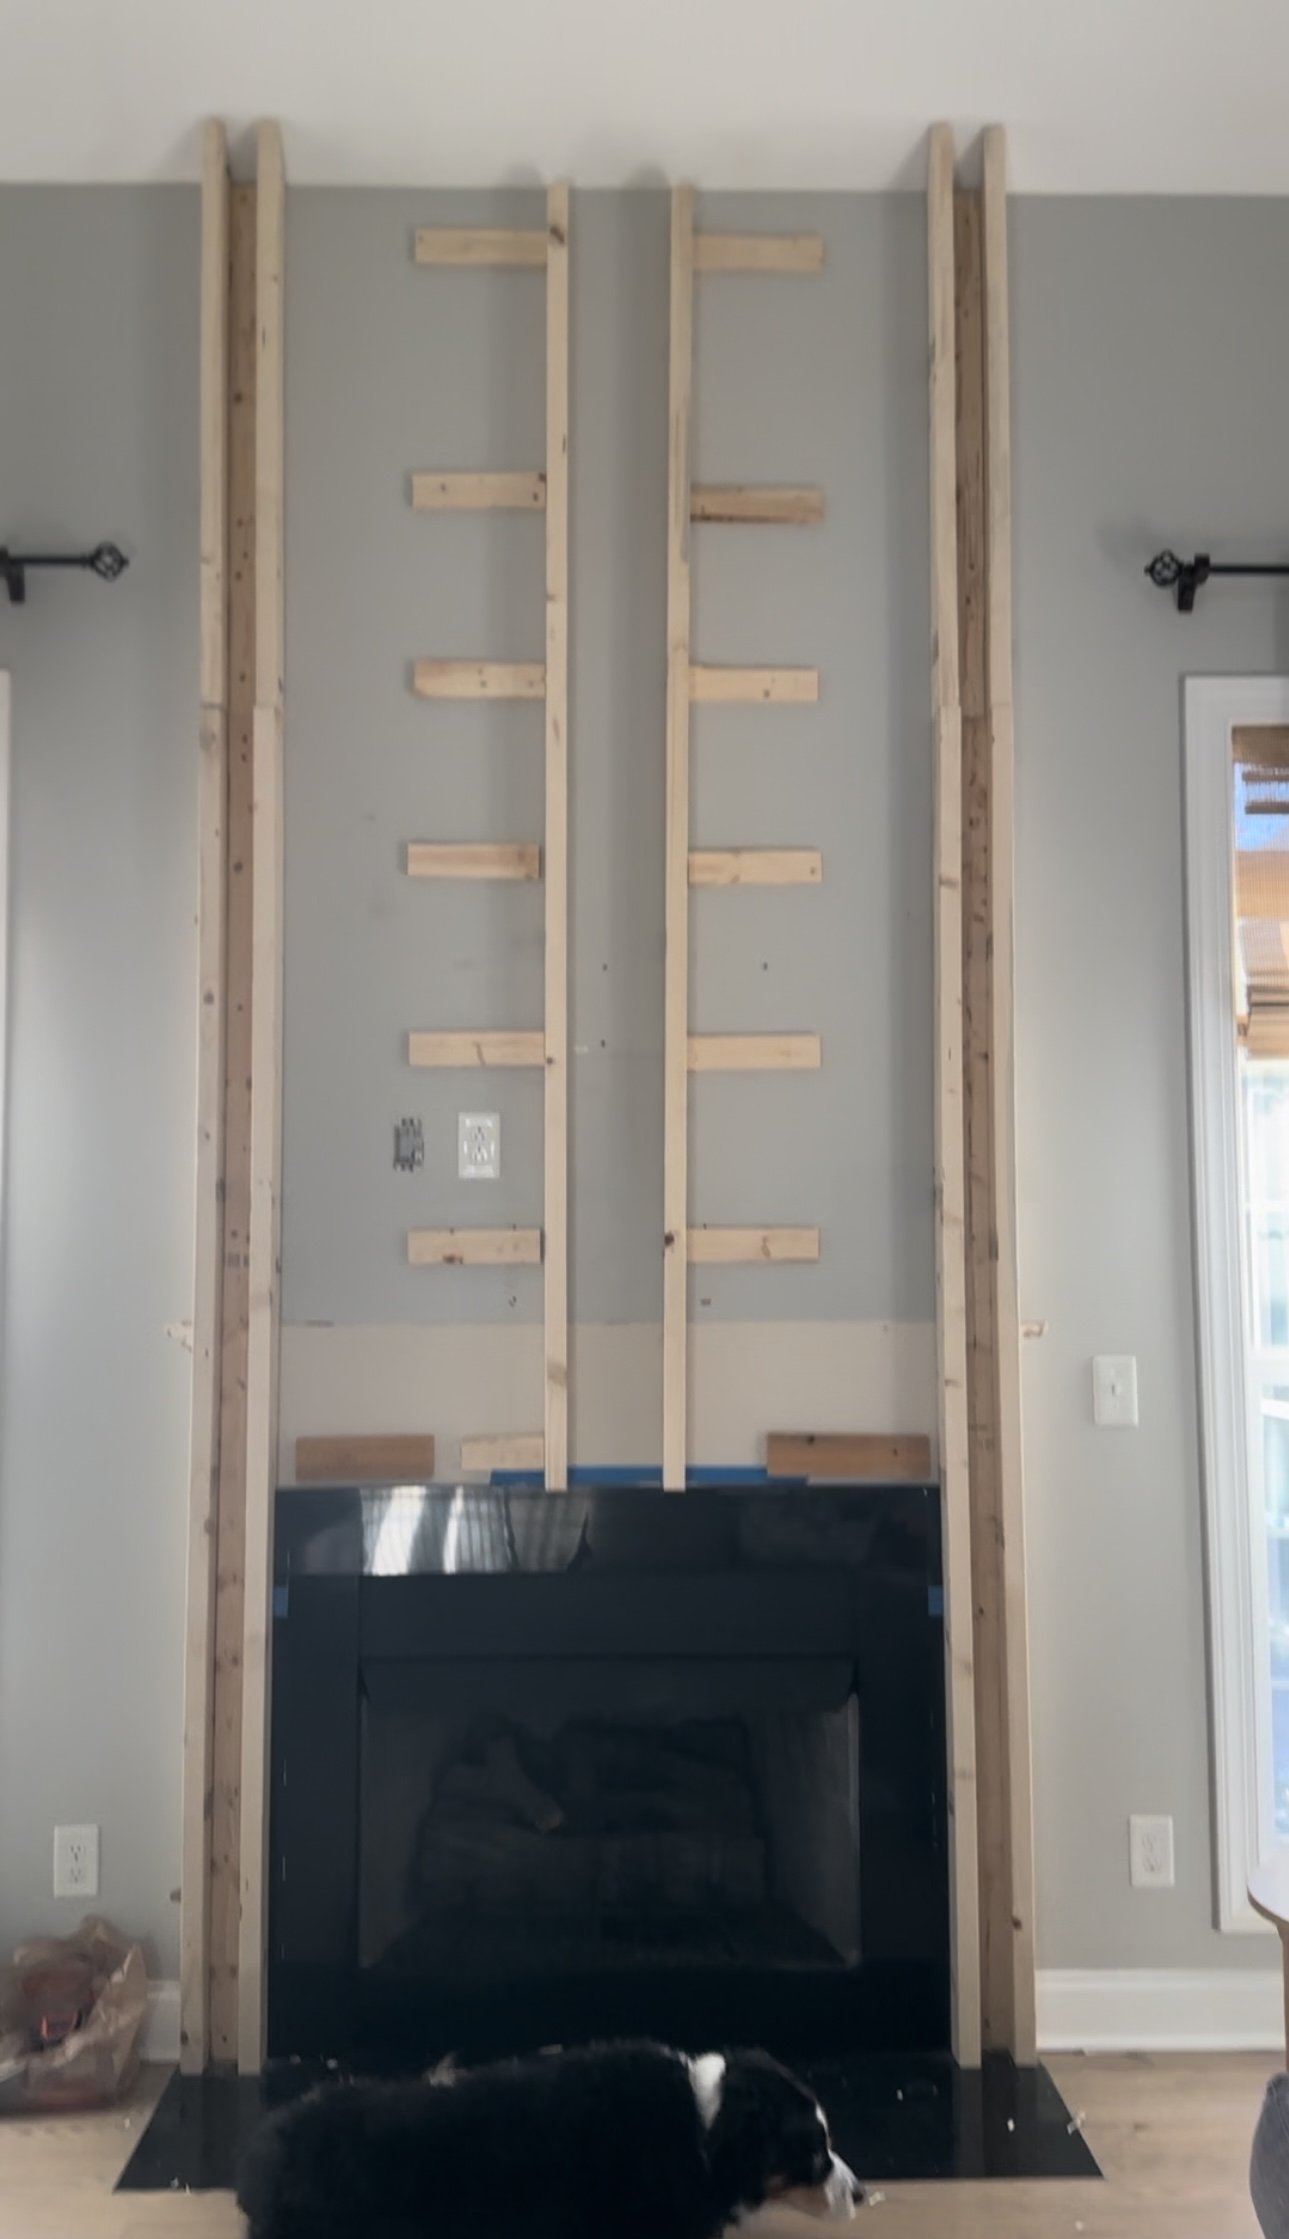
My stud wall
Measure the area around the fireplace where you want to build the stud wall. Mark out the measurements on the floor with chalk or a pencil.
Use a stud finder to locate the studs in the existing wall on either side of the fireplace. Mark the location of each stud with a pencil.
Cut pieces of 2x4 lumber to the length of the wall you want to build. These will be the side plates of the stud wall. See picture above. For the side supports, using wood screws, screw the middle board to the stud, and then screw the a board on each side to create dimension. Mine is 4 inches deep.
Cut two additional pieces of 2x4 lumber to the height of the top of the fireplace opening to the top of the wall. Cut several smaller pieces that will be screwed in horizontally to the studs in wall to be the support for the two additional vertical boards in the middle. Screw those two additional boards into these horizontal boards using nail screws - I used 4 inch screws.
Depending on your wall, and materials used, you may need to build your stud wall first, then bring in and attach to wall. I was not building a fire place from scratch, so I just screwed directly on the wall.
Note: Cut your 2x4 lumber to size using a saw, or you can even have your local hardware store cut for you. Use a level to ensure that the frame is straight and level. You'll want to attach the frame to the existing wall studs using wood screws. Use your stud finder to make sure you are hitting the studs before nailing/screwing.
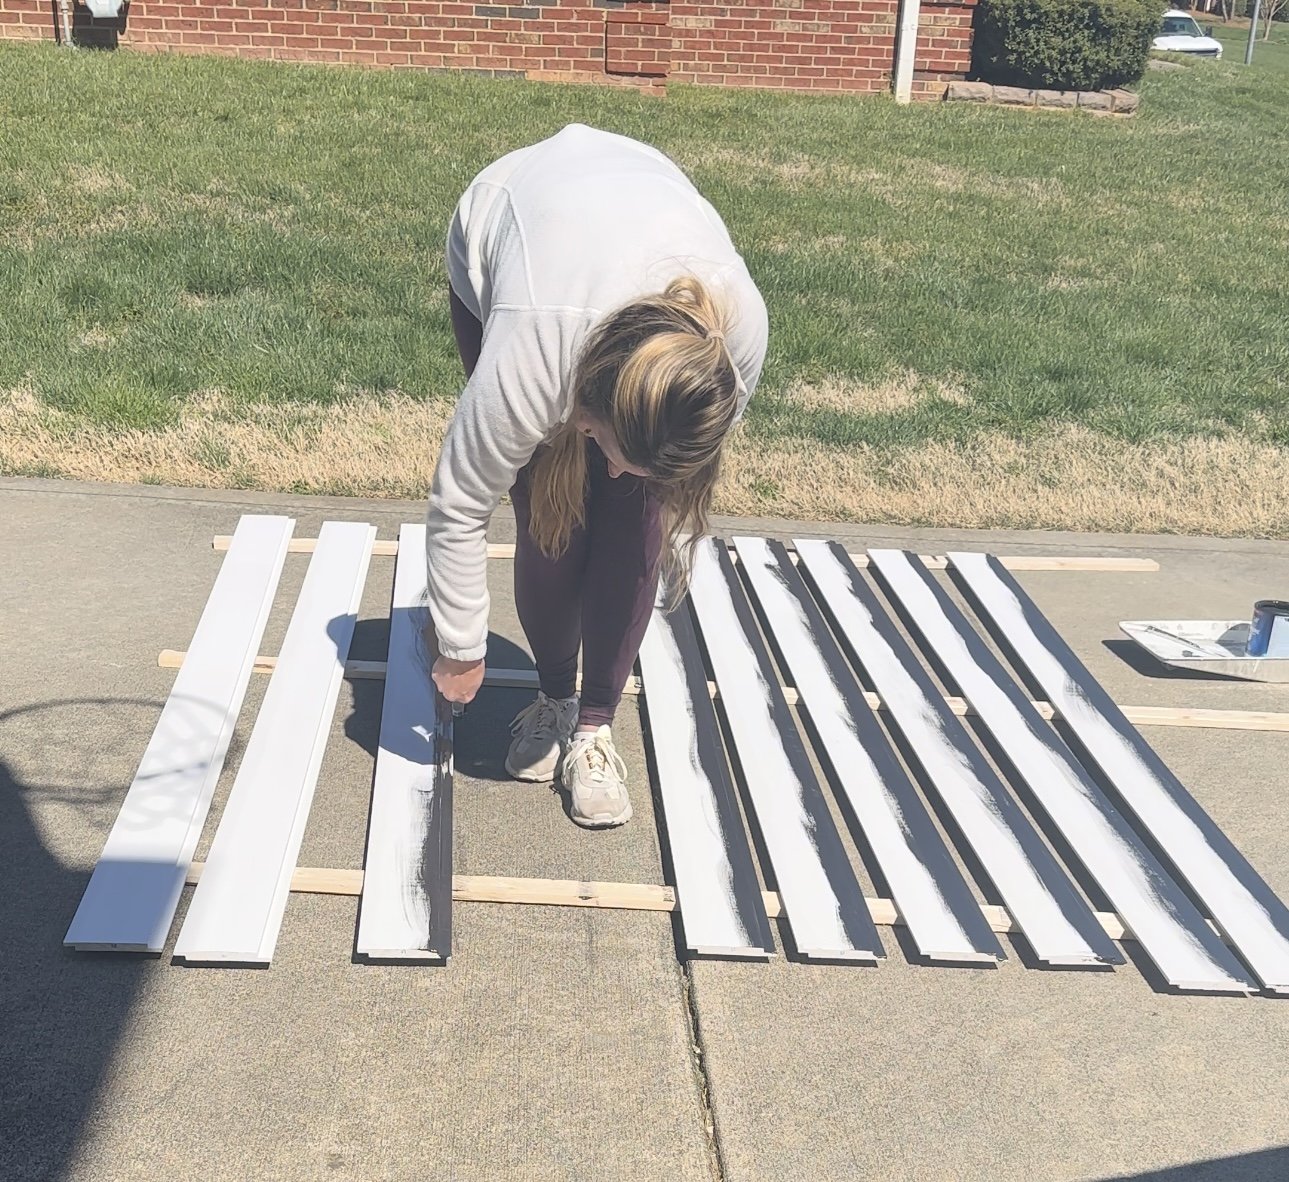
Step 4: Cut and paint shiplap
I painted tops and bottom of my shiplap first. This will help make sure you get the lapping section of the board painted well. Once nailed, it is hard to paint between the boards.
With your measurements and plan in hand, it's time to start cutting the shiplap!
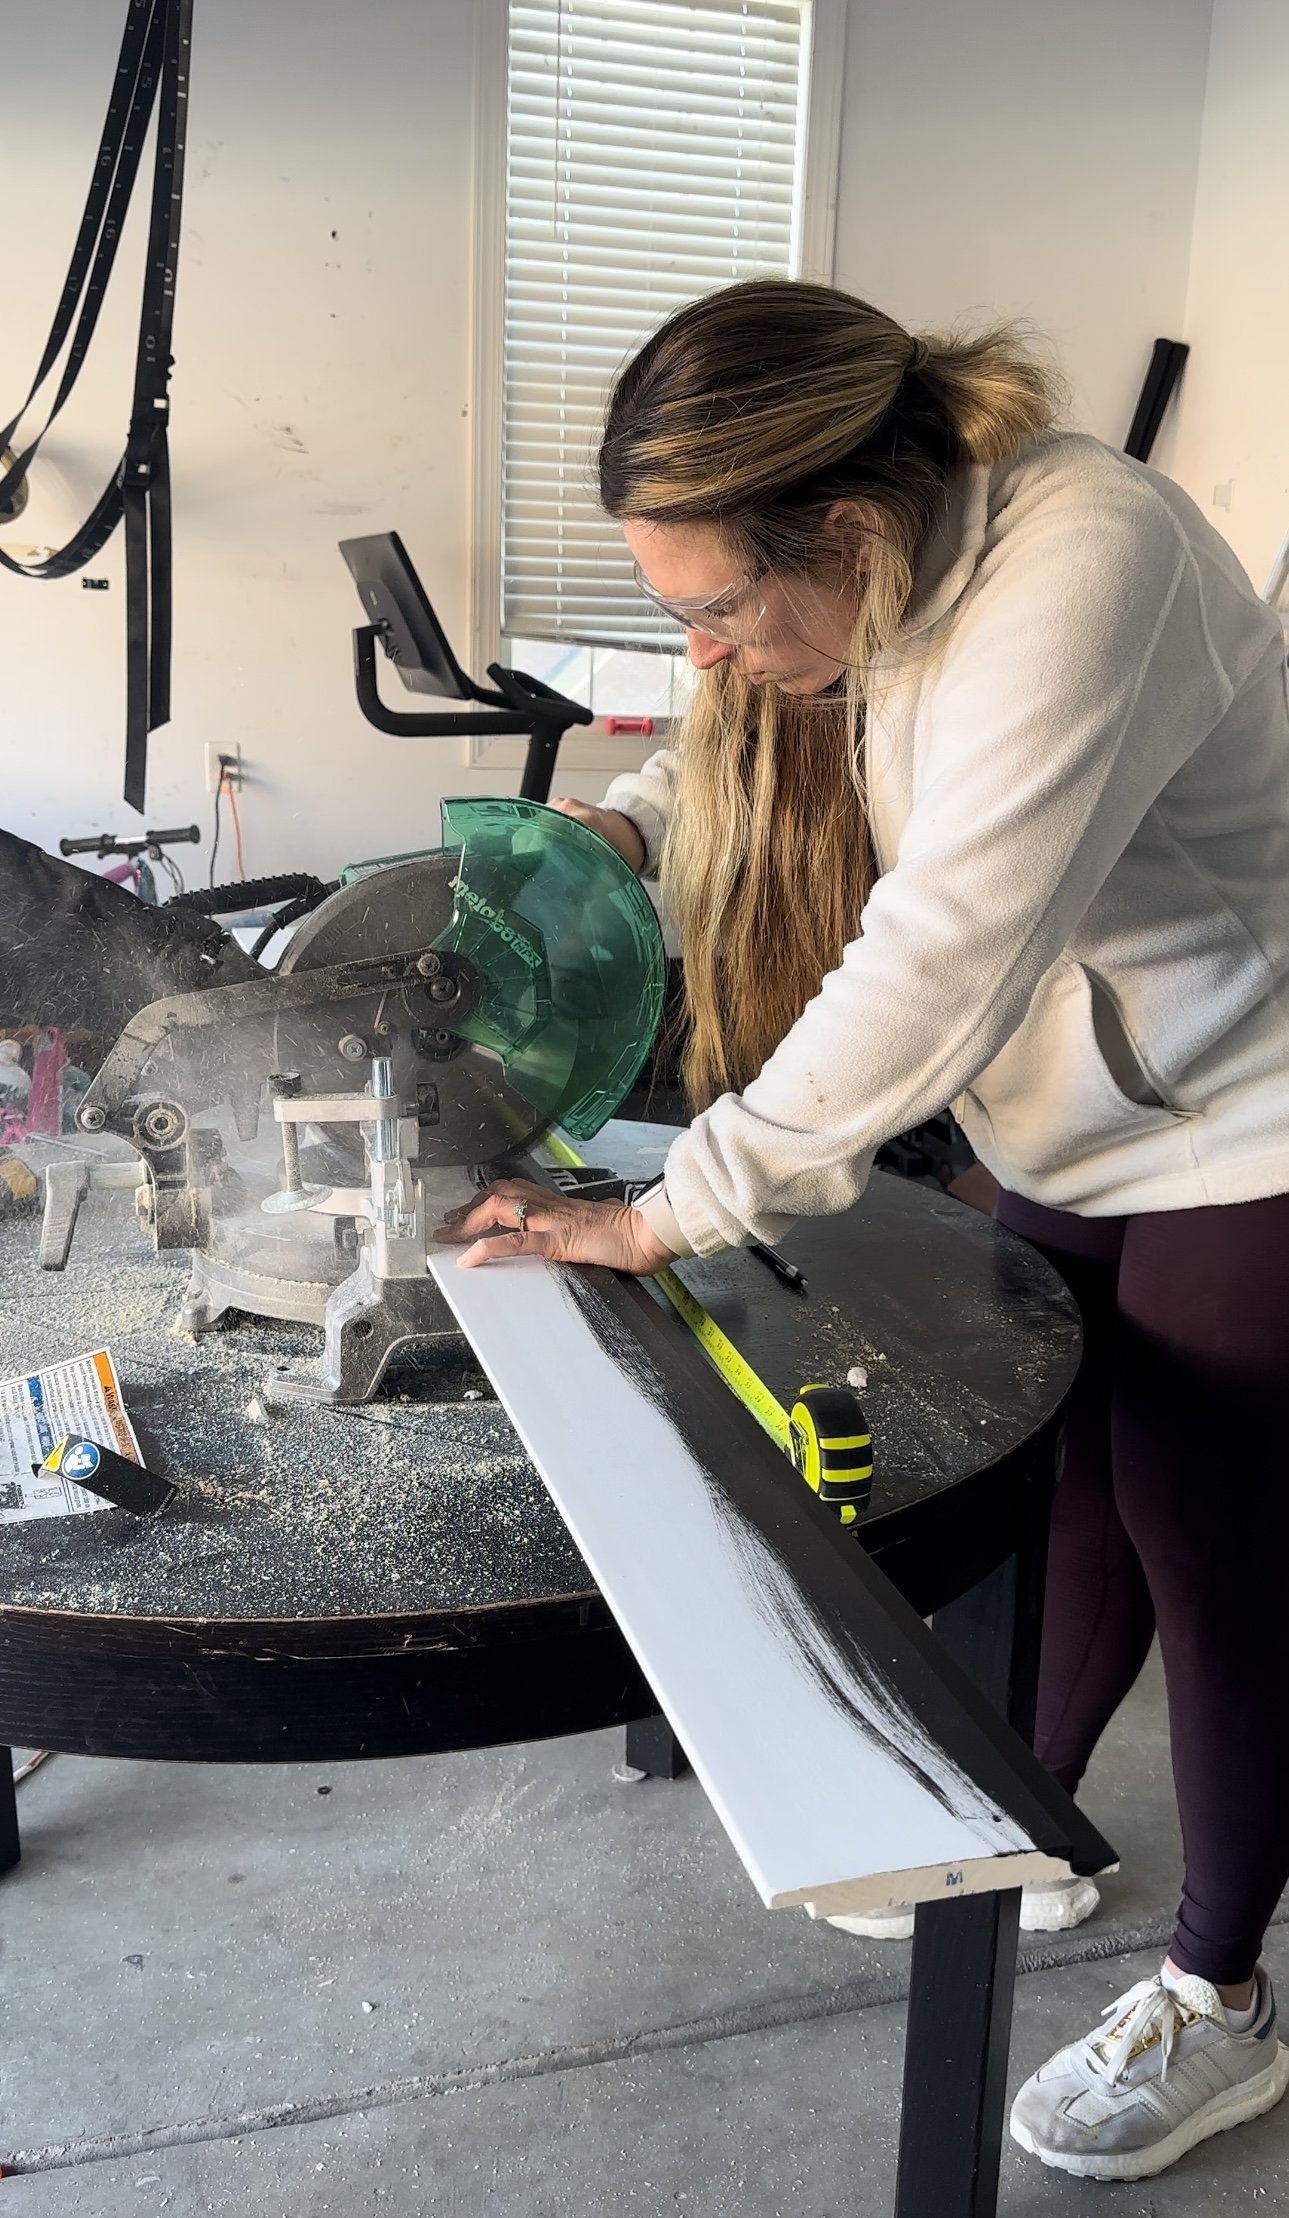
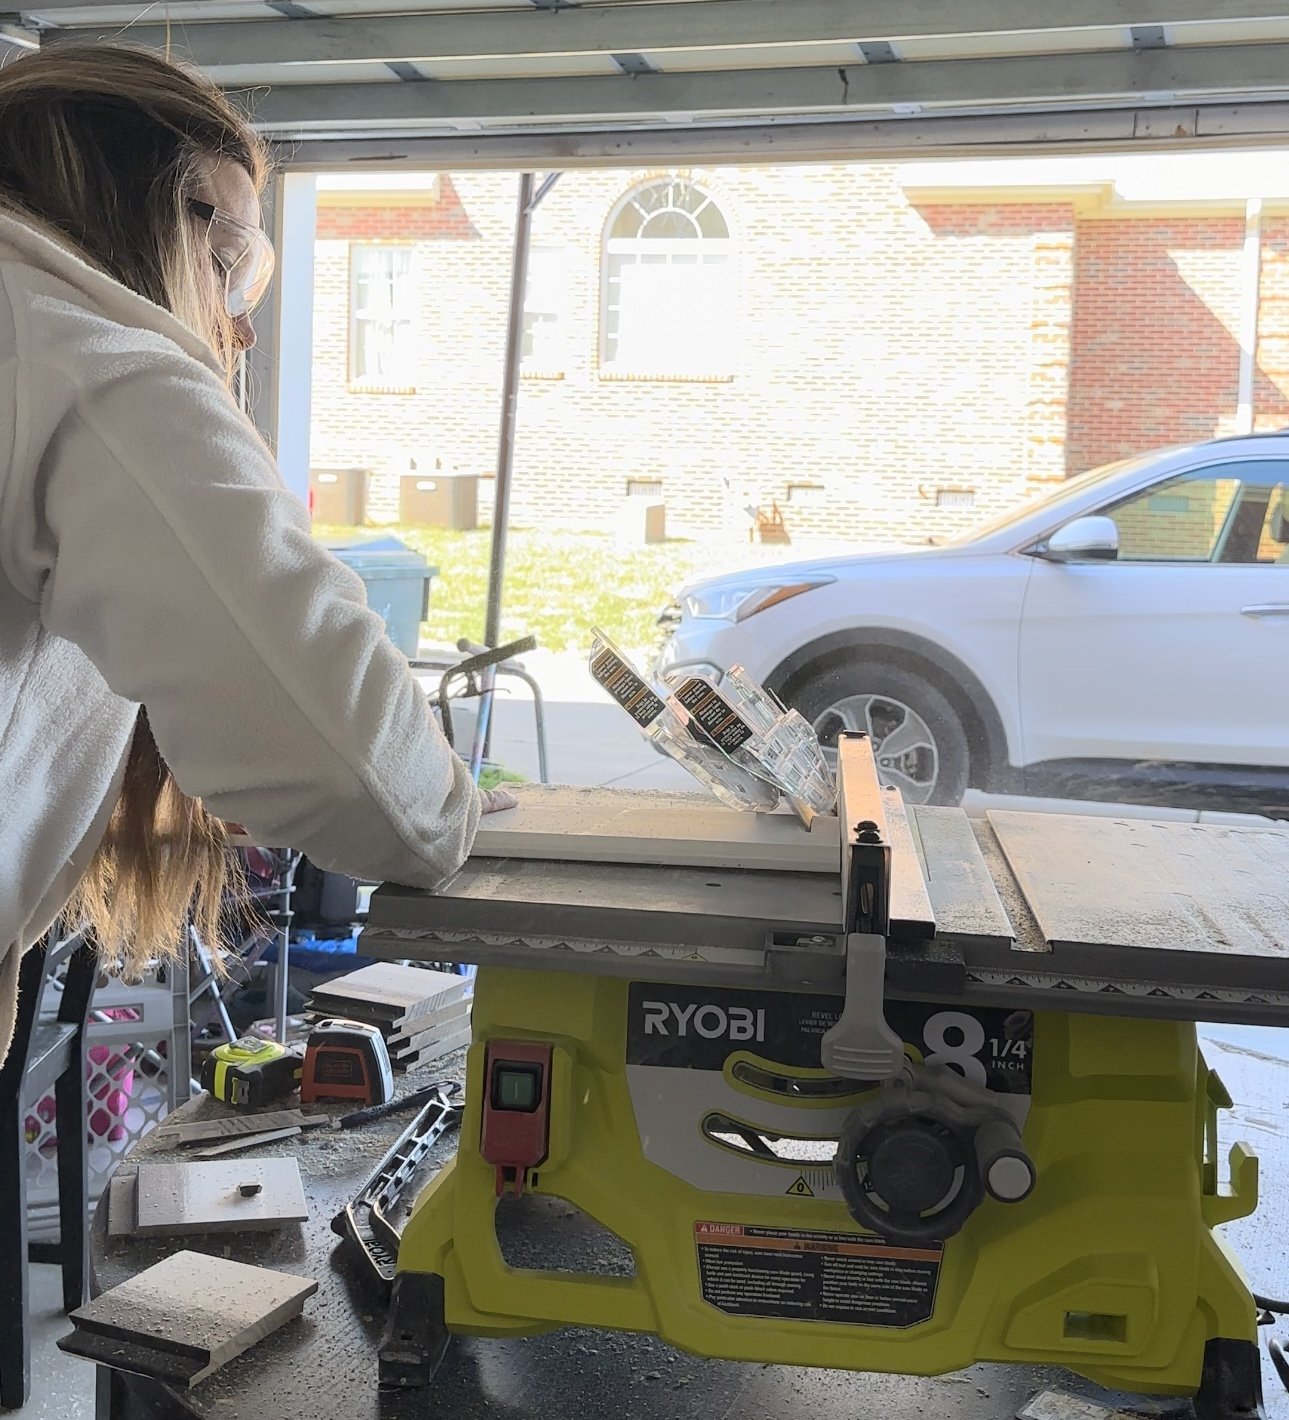
Begin by cutting your shiplap to the correct and desired length and width for each section of the fireplace surround. You can use a saw or a miter saw to make precise cuts.
You will cut each of the ends of the front boards at 45 degrees. The side boards will then meet the front boards, and will need to also be cut at 45 degrees to get you that 90 degree angle.
If you have any angles on your ceiling, you will need to use a T-Bevel to figure out what angle to cut.
Cutting front board at 45 degree angle
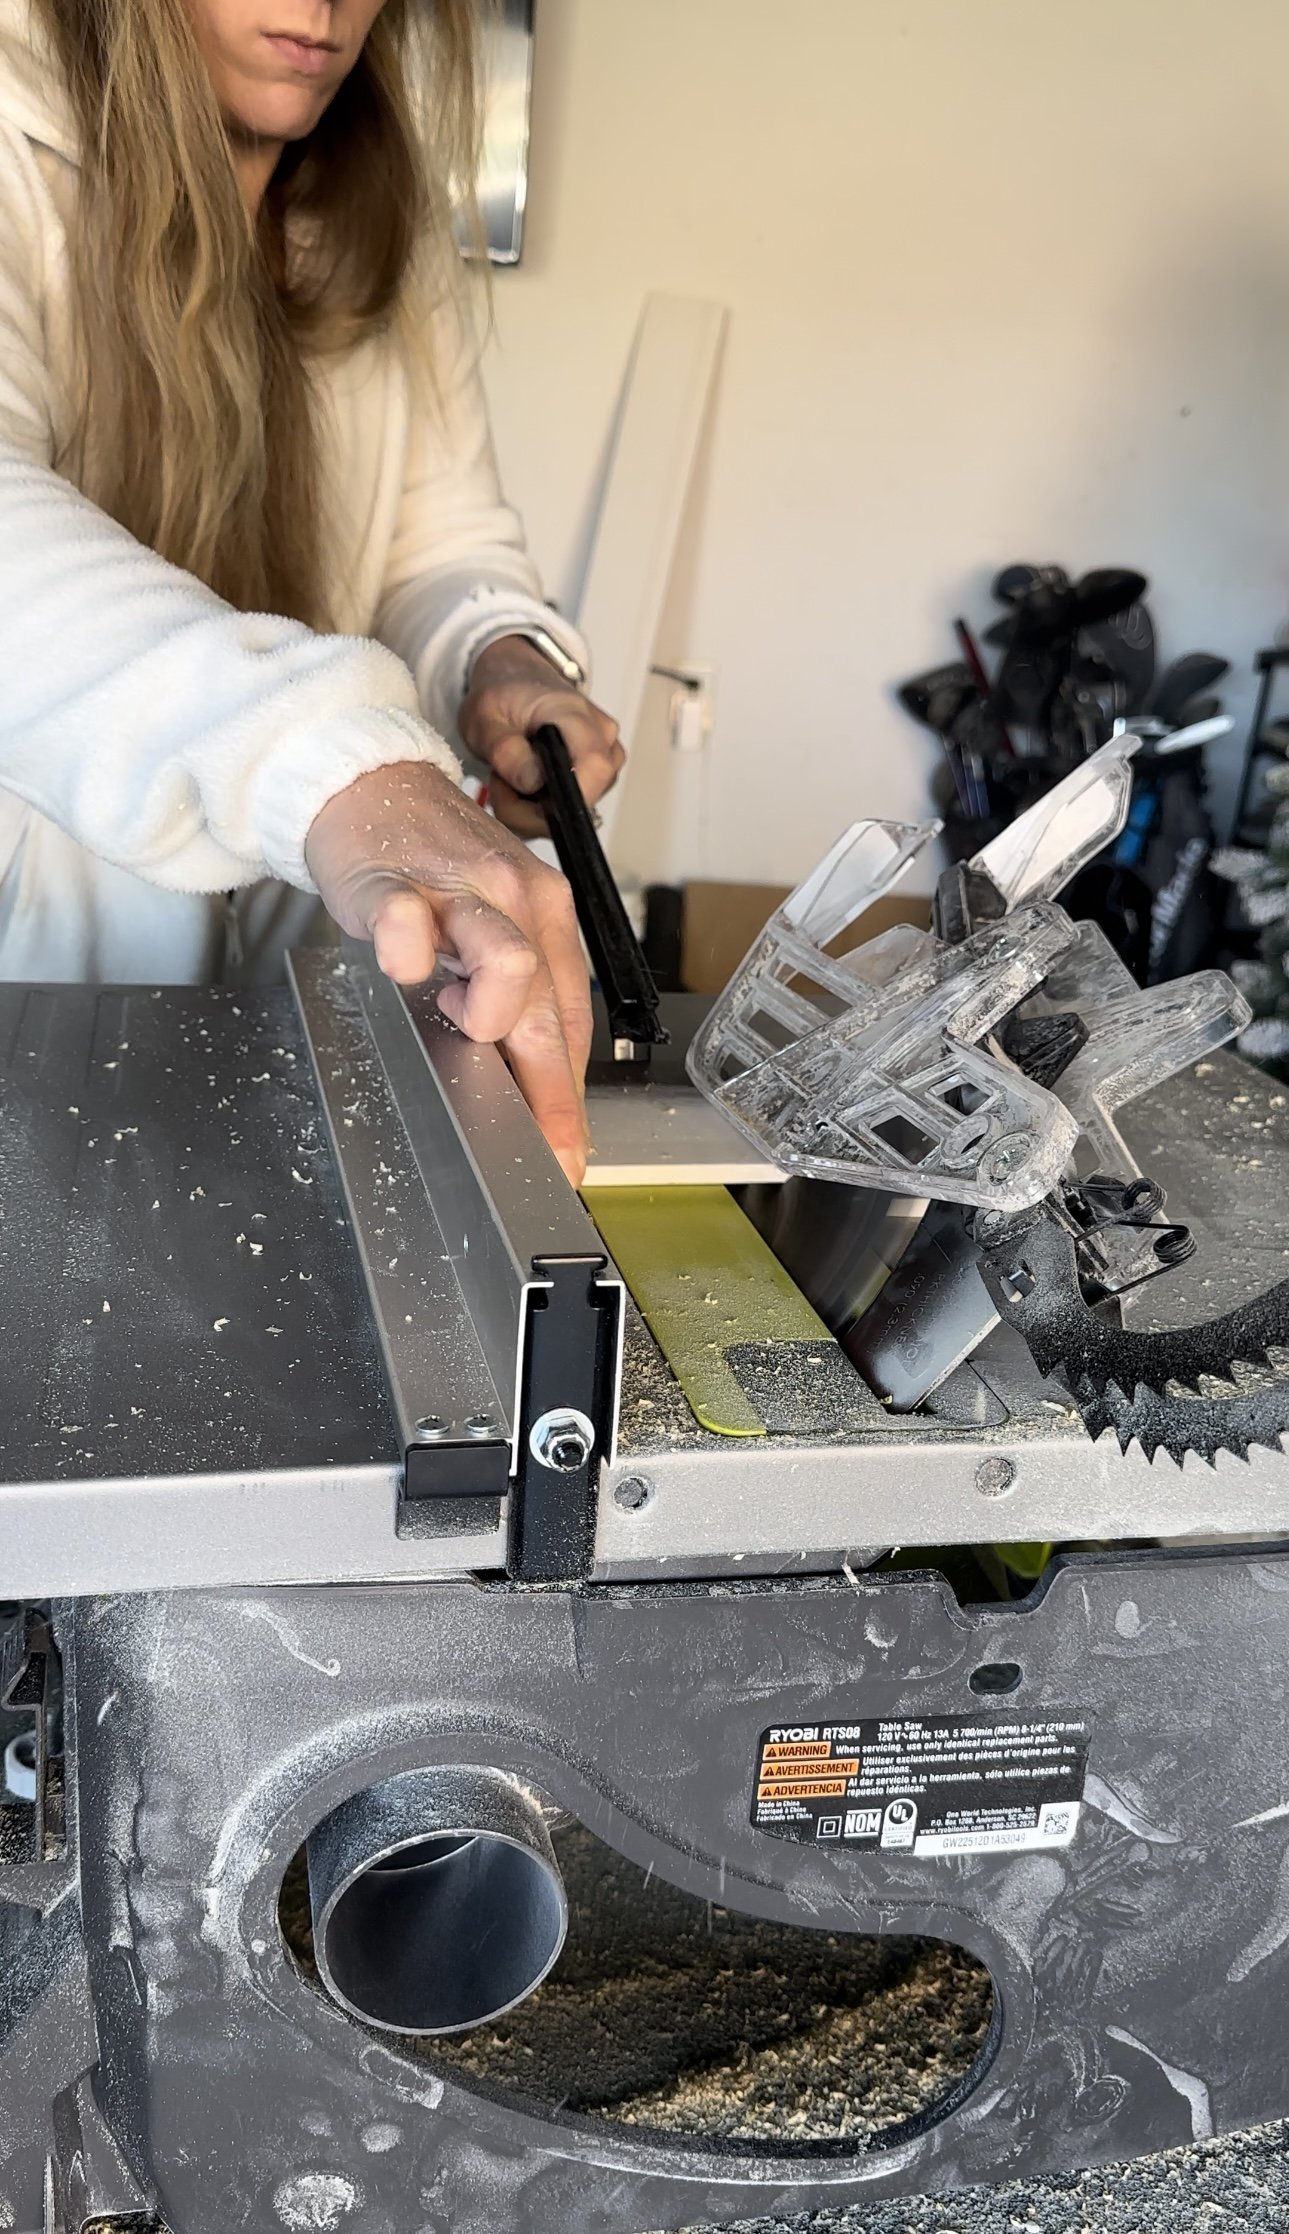
Cutting side boards at 45 degree angle
Test-fit the board against the framing and side boards to ensure a seamless fit. Adjust the cut as needed.
Repeat for each board, taking care to ensure that the angles are consistent and the boards fit tightly together.
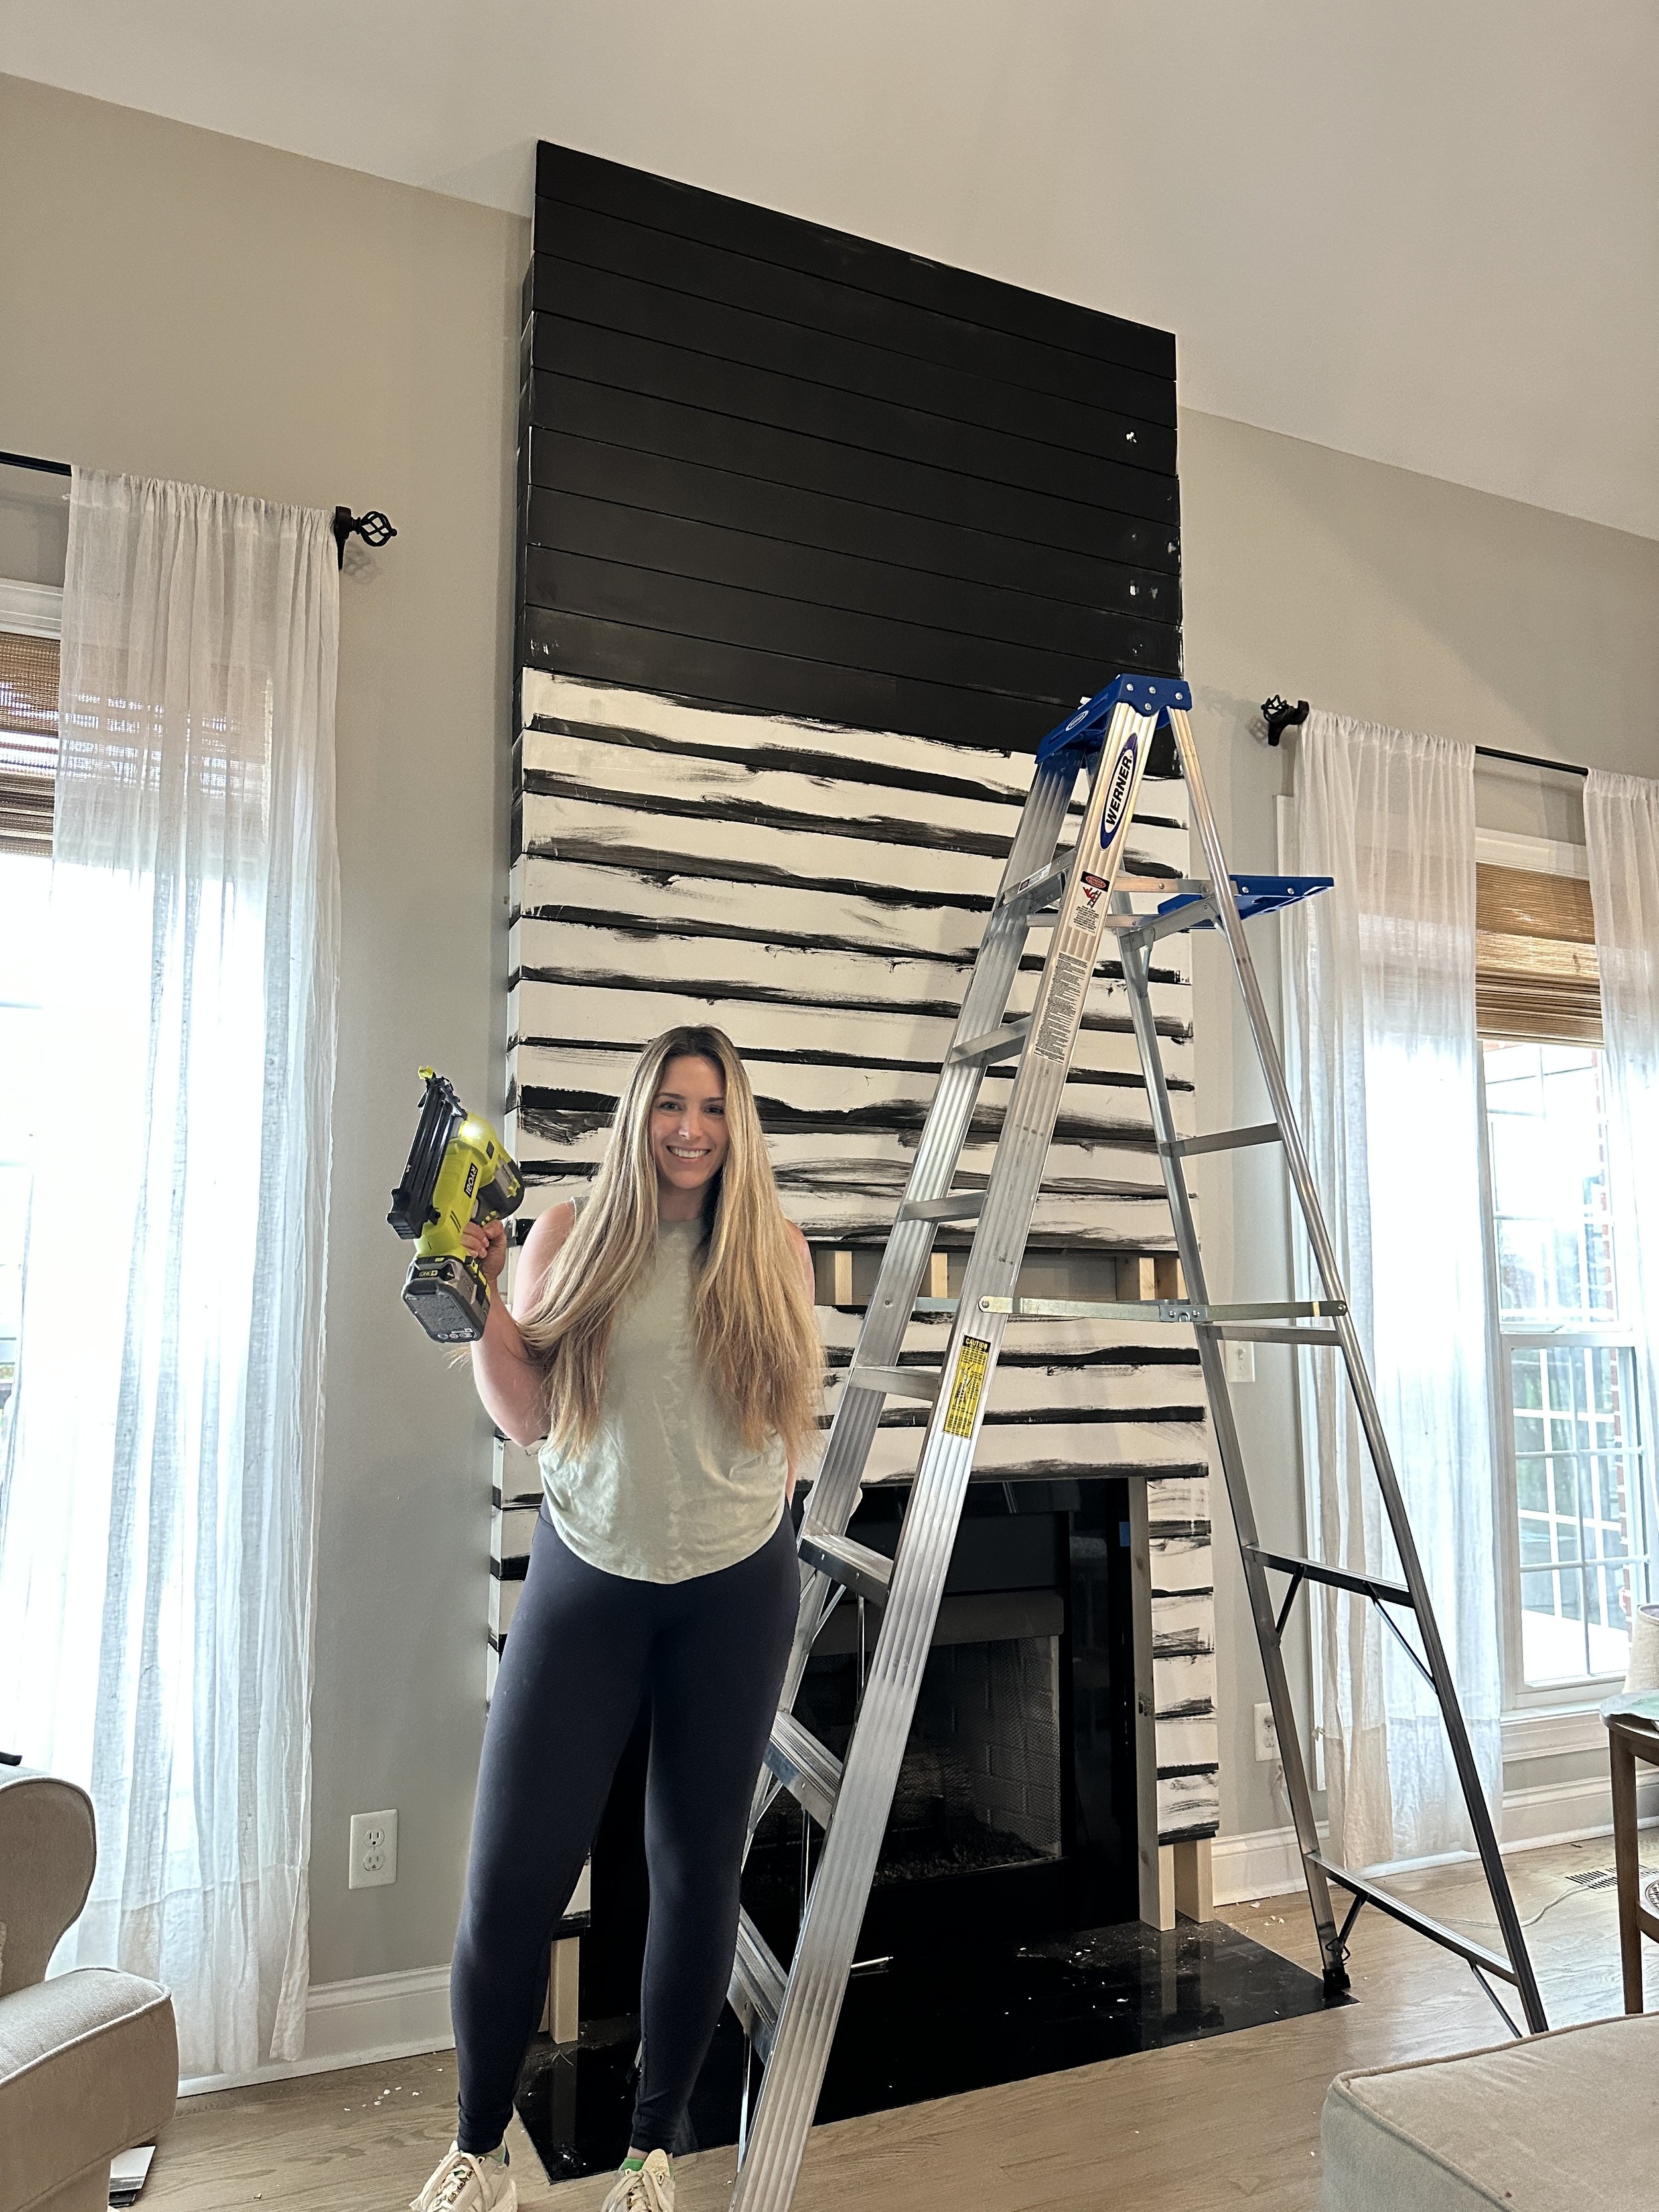
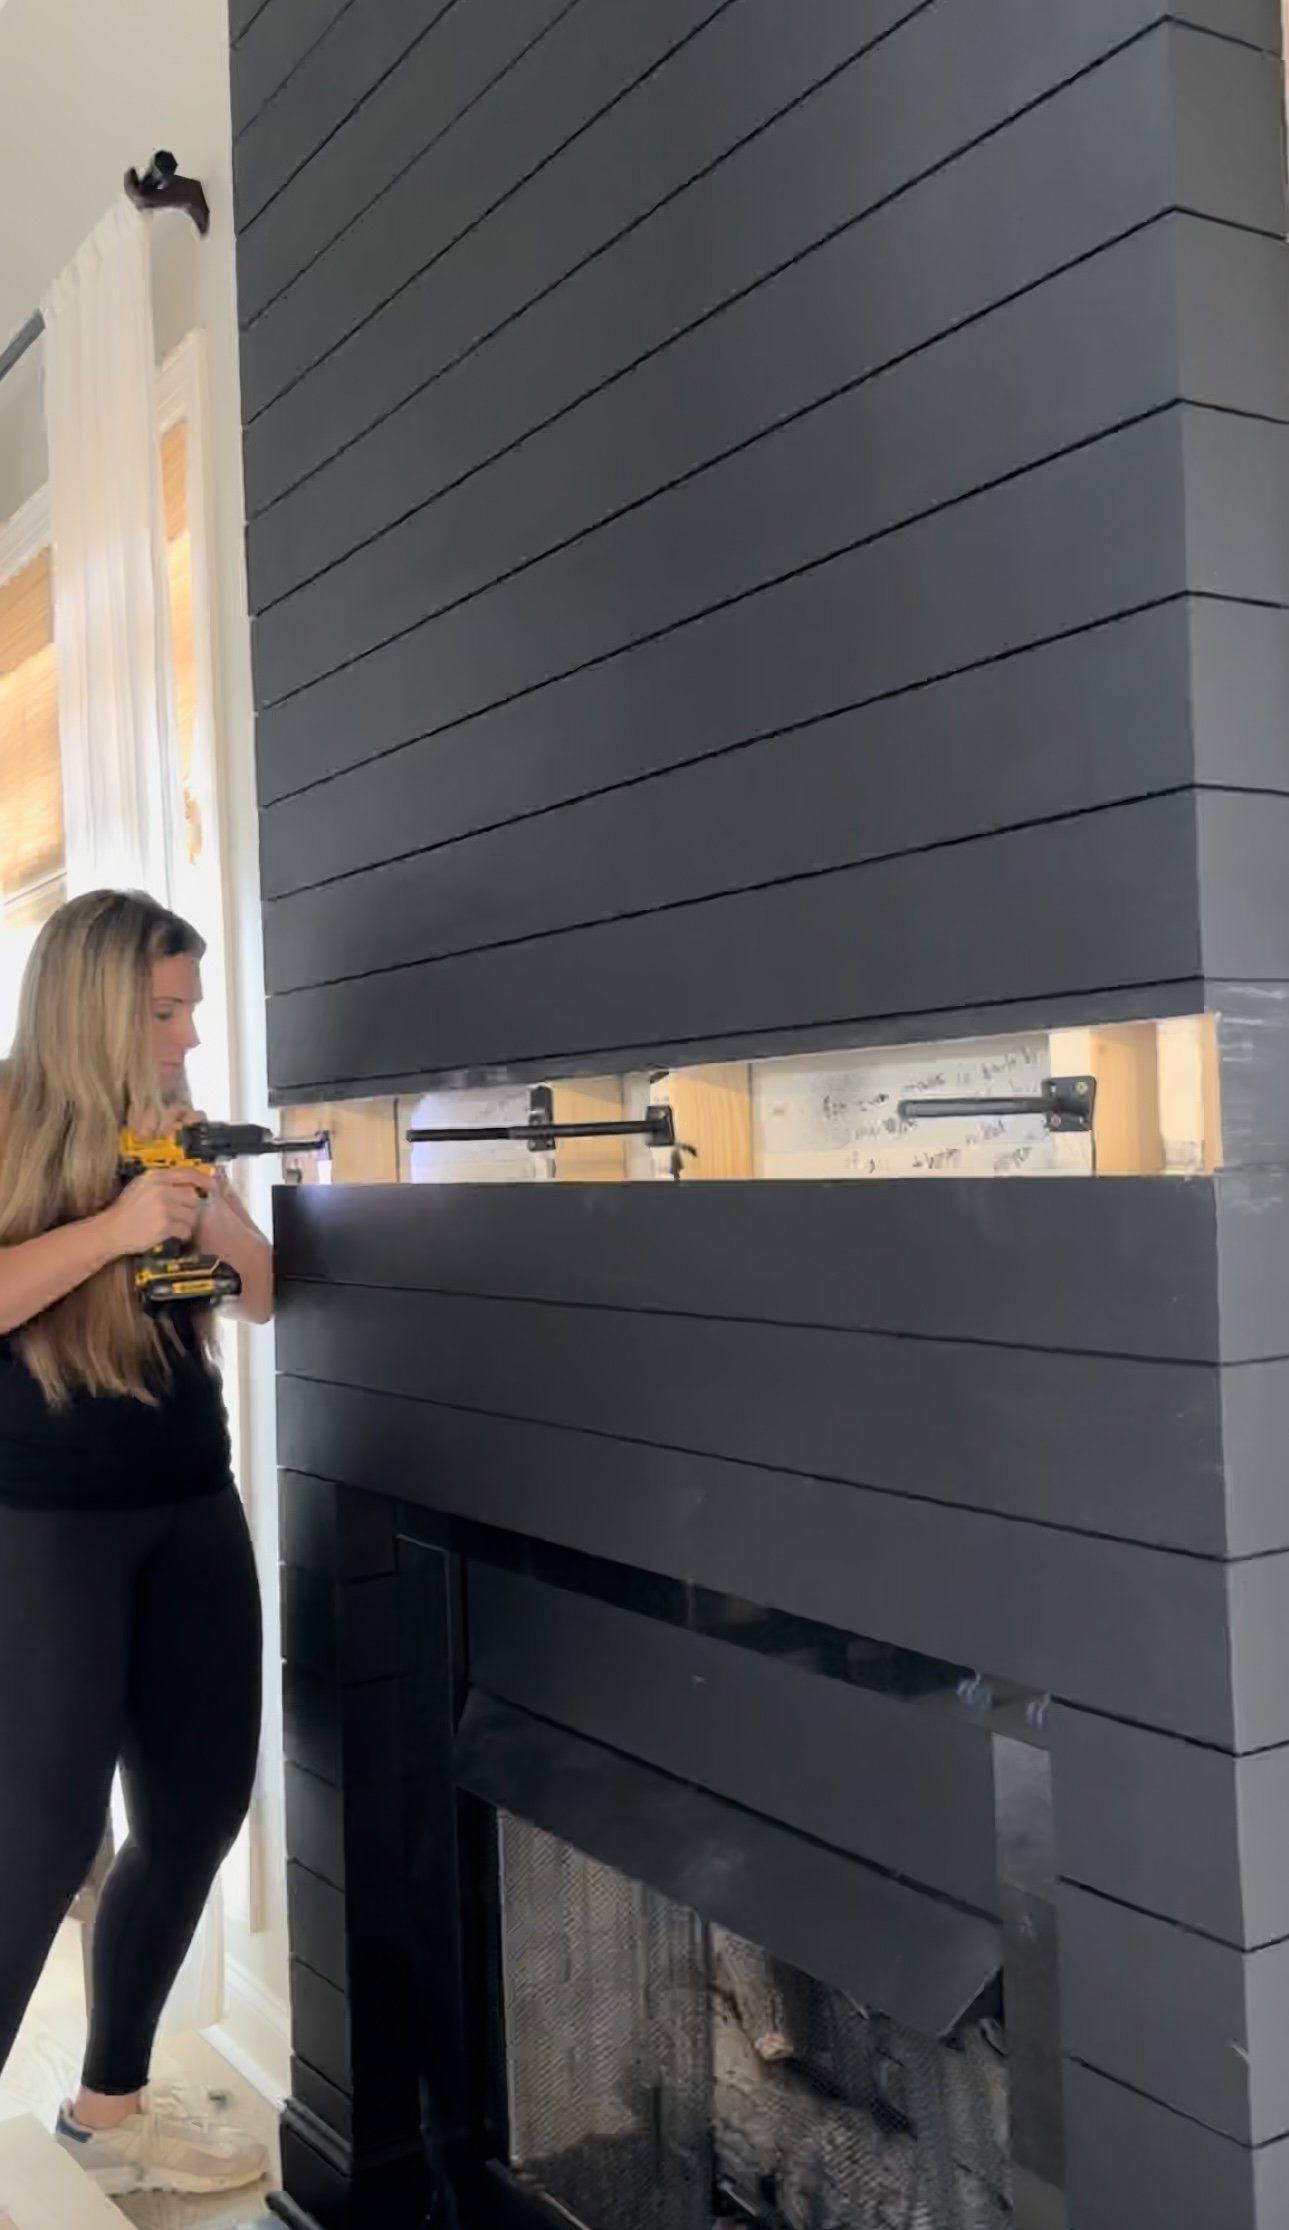
Once all the boards are cut and fitted, attach them to the framing with your nail gun, nails or screws, using a level to ensure they are straight.
I started at the top and worked my way down, attaching each piece of shiplap with my brad nail gun.
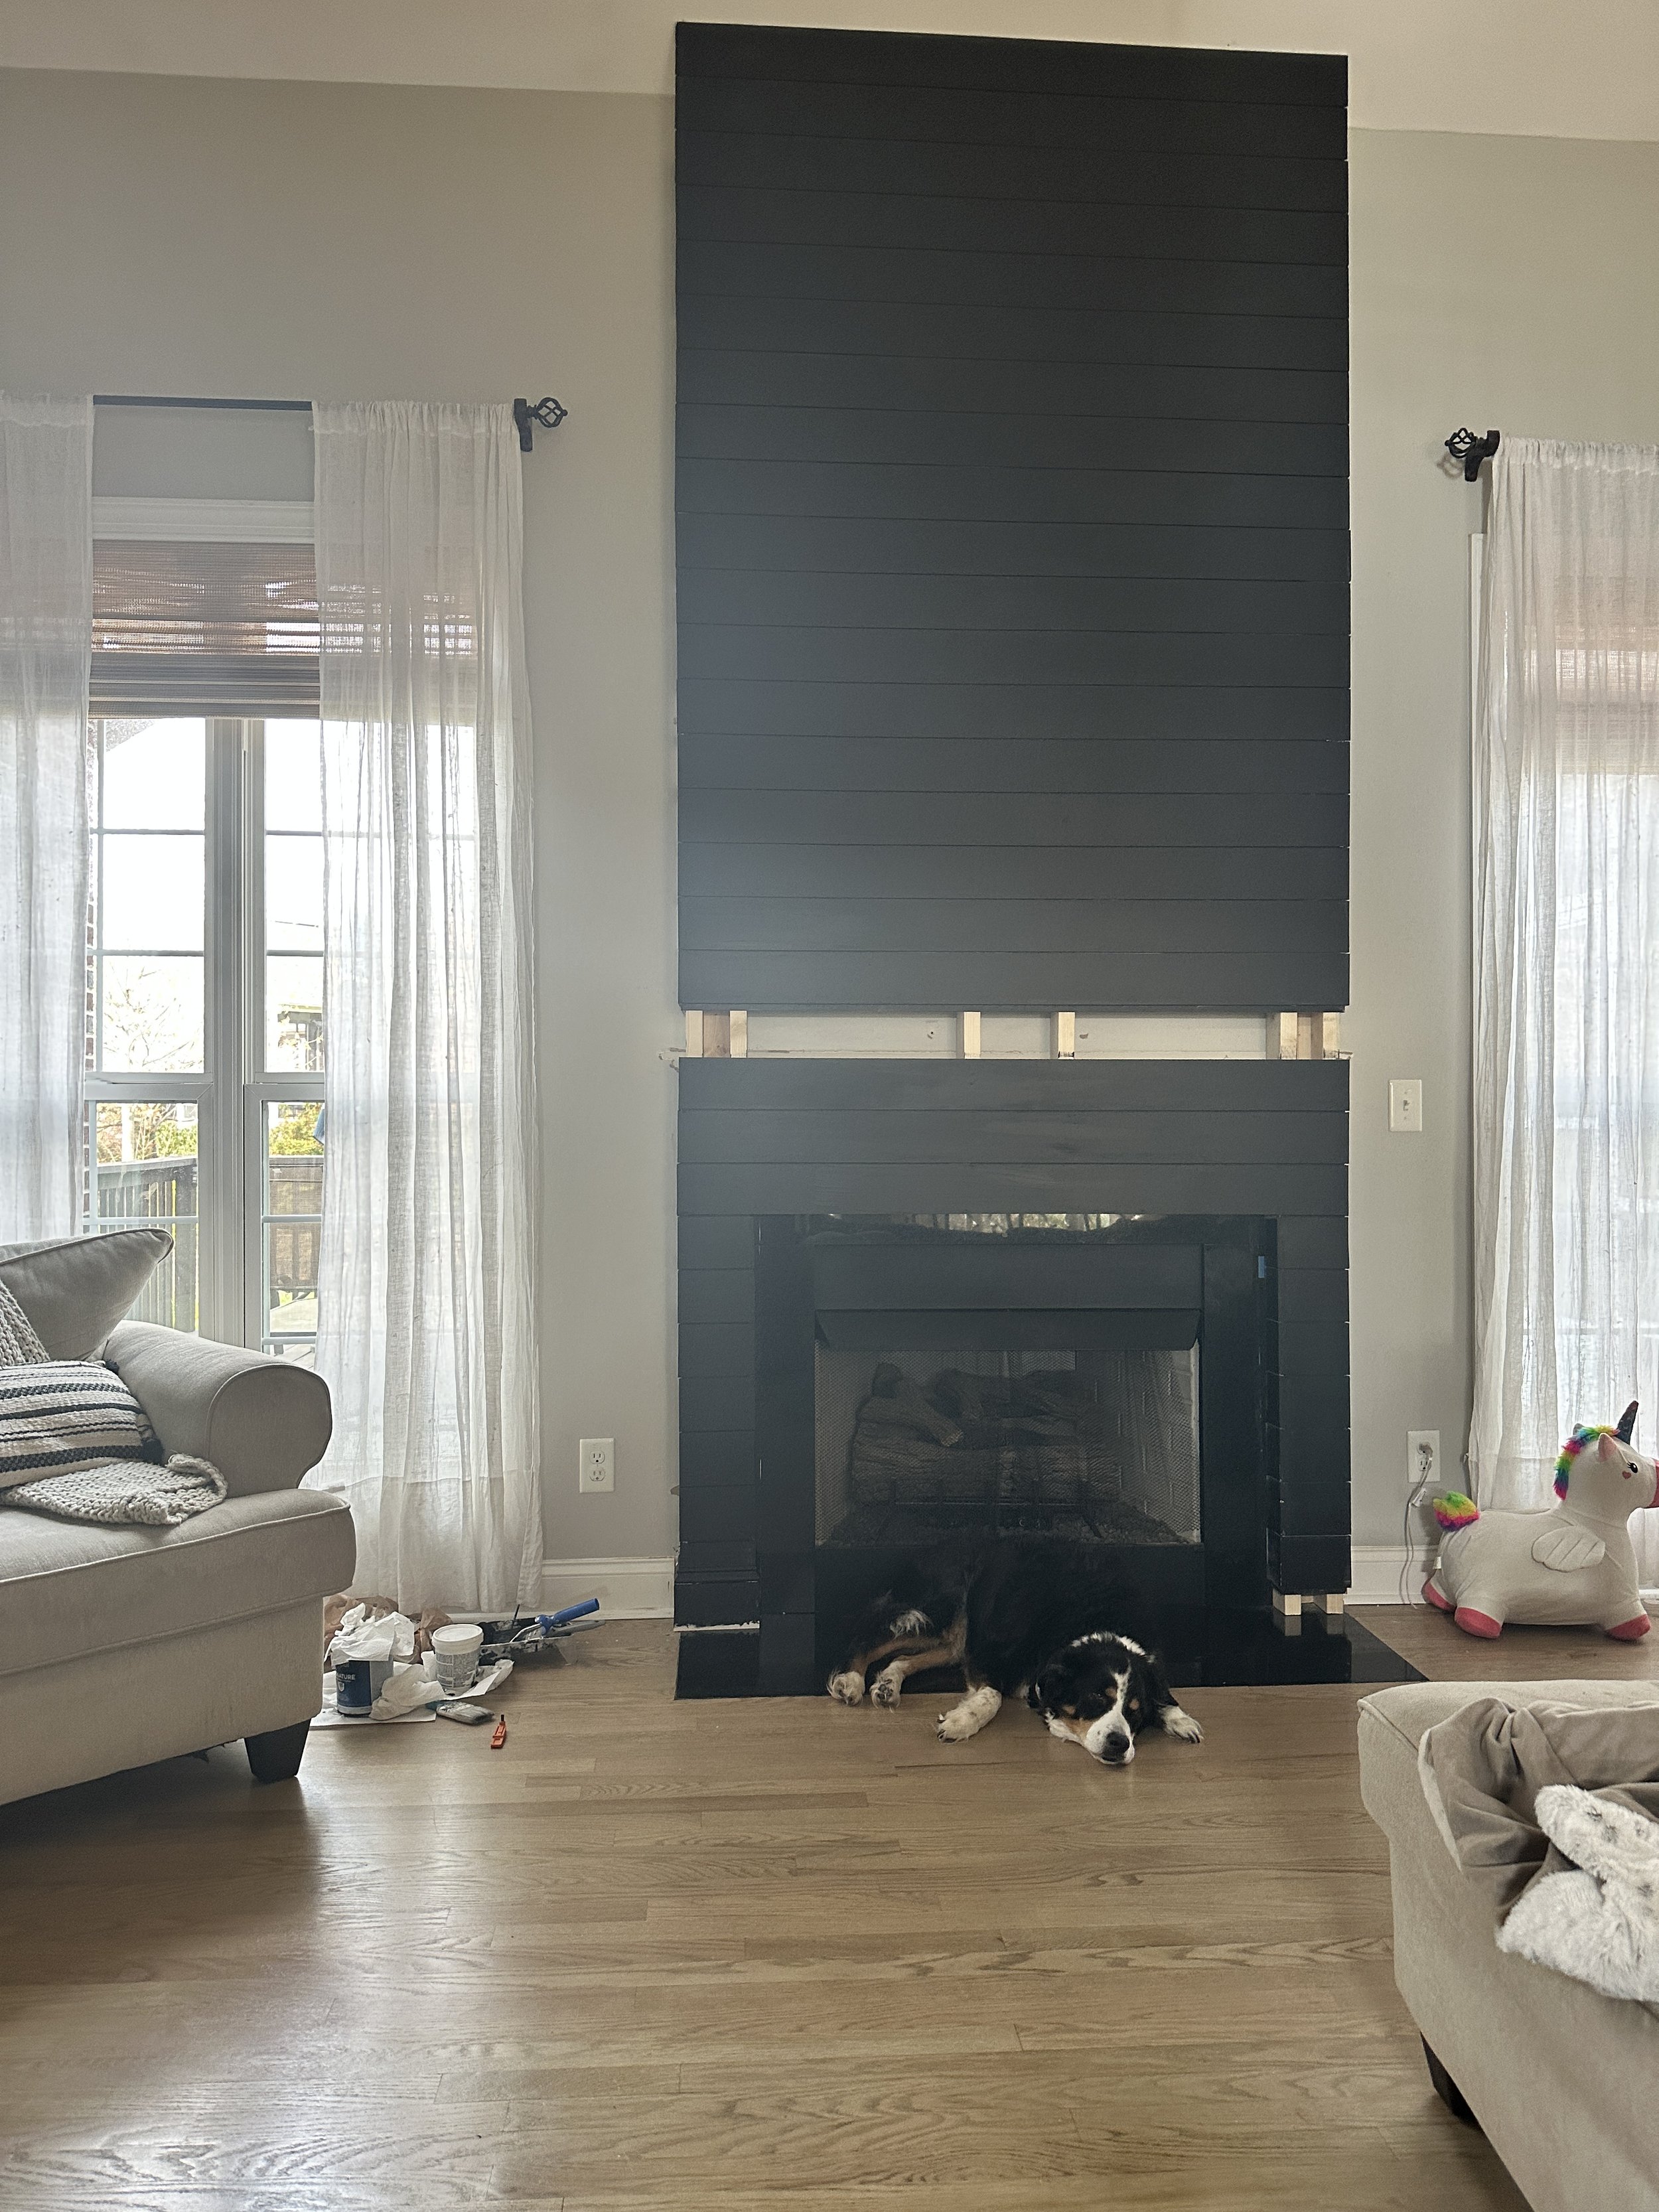
I left a gap of 4 inches where I planned on putting my mantle. You can do this, or install mantle directly on boards. If you install directly, make sure you mark where the studs are behind the shiplap boards.
Step 5: Finish the Shiplap
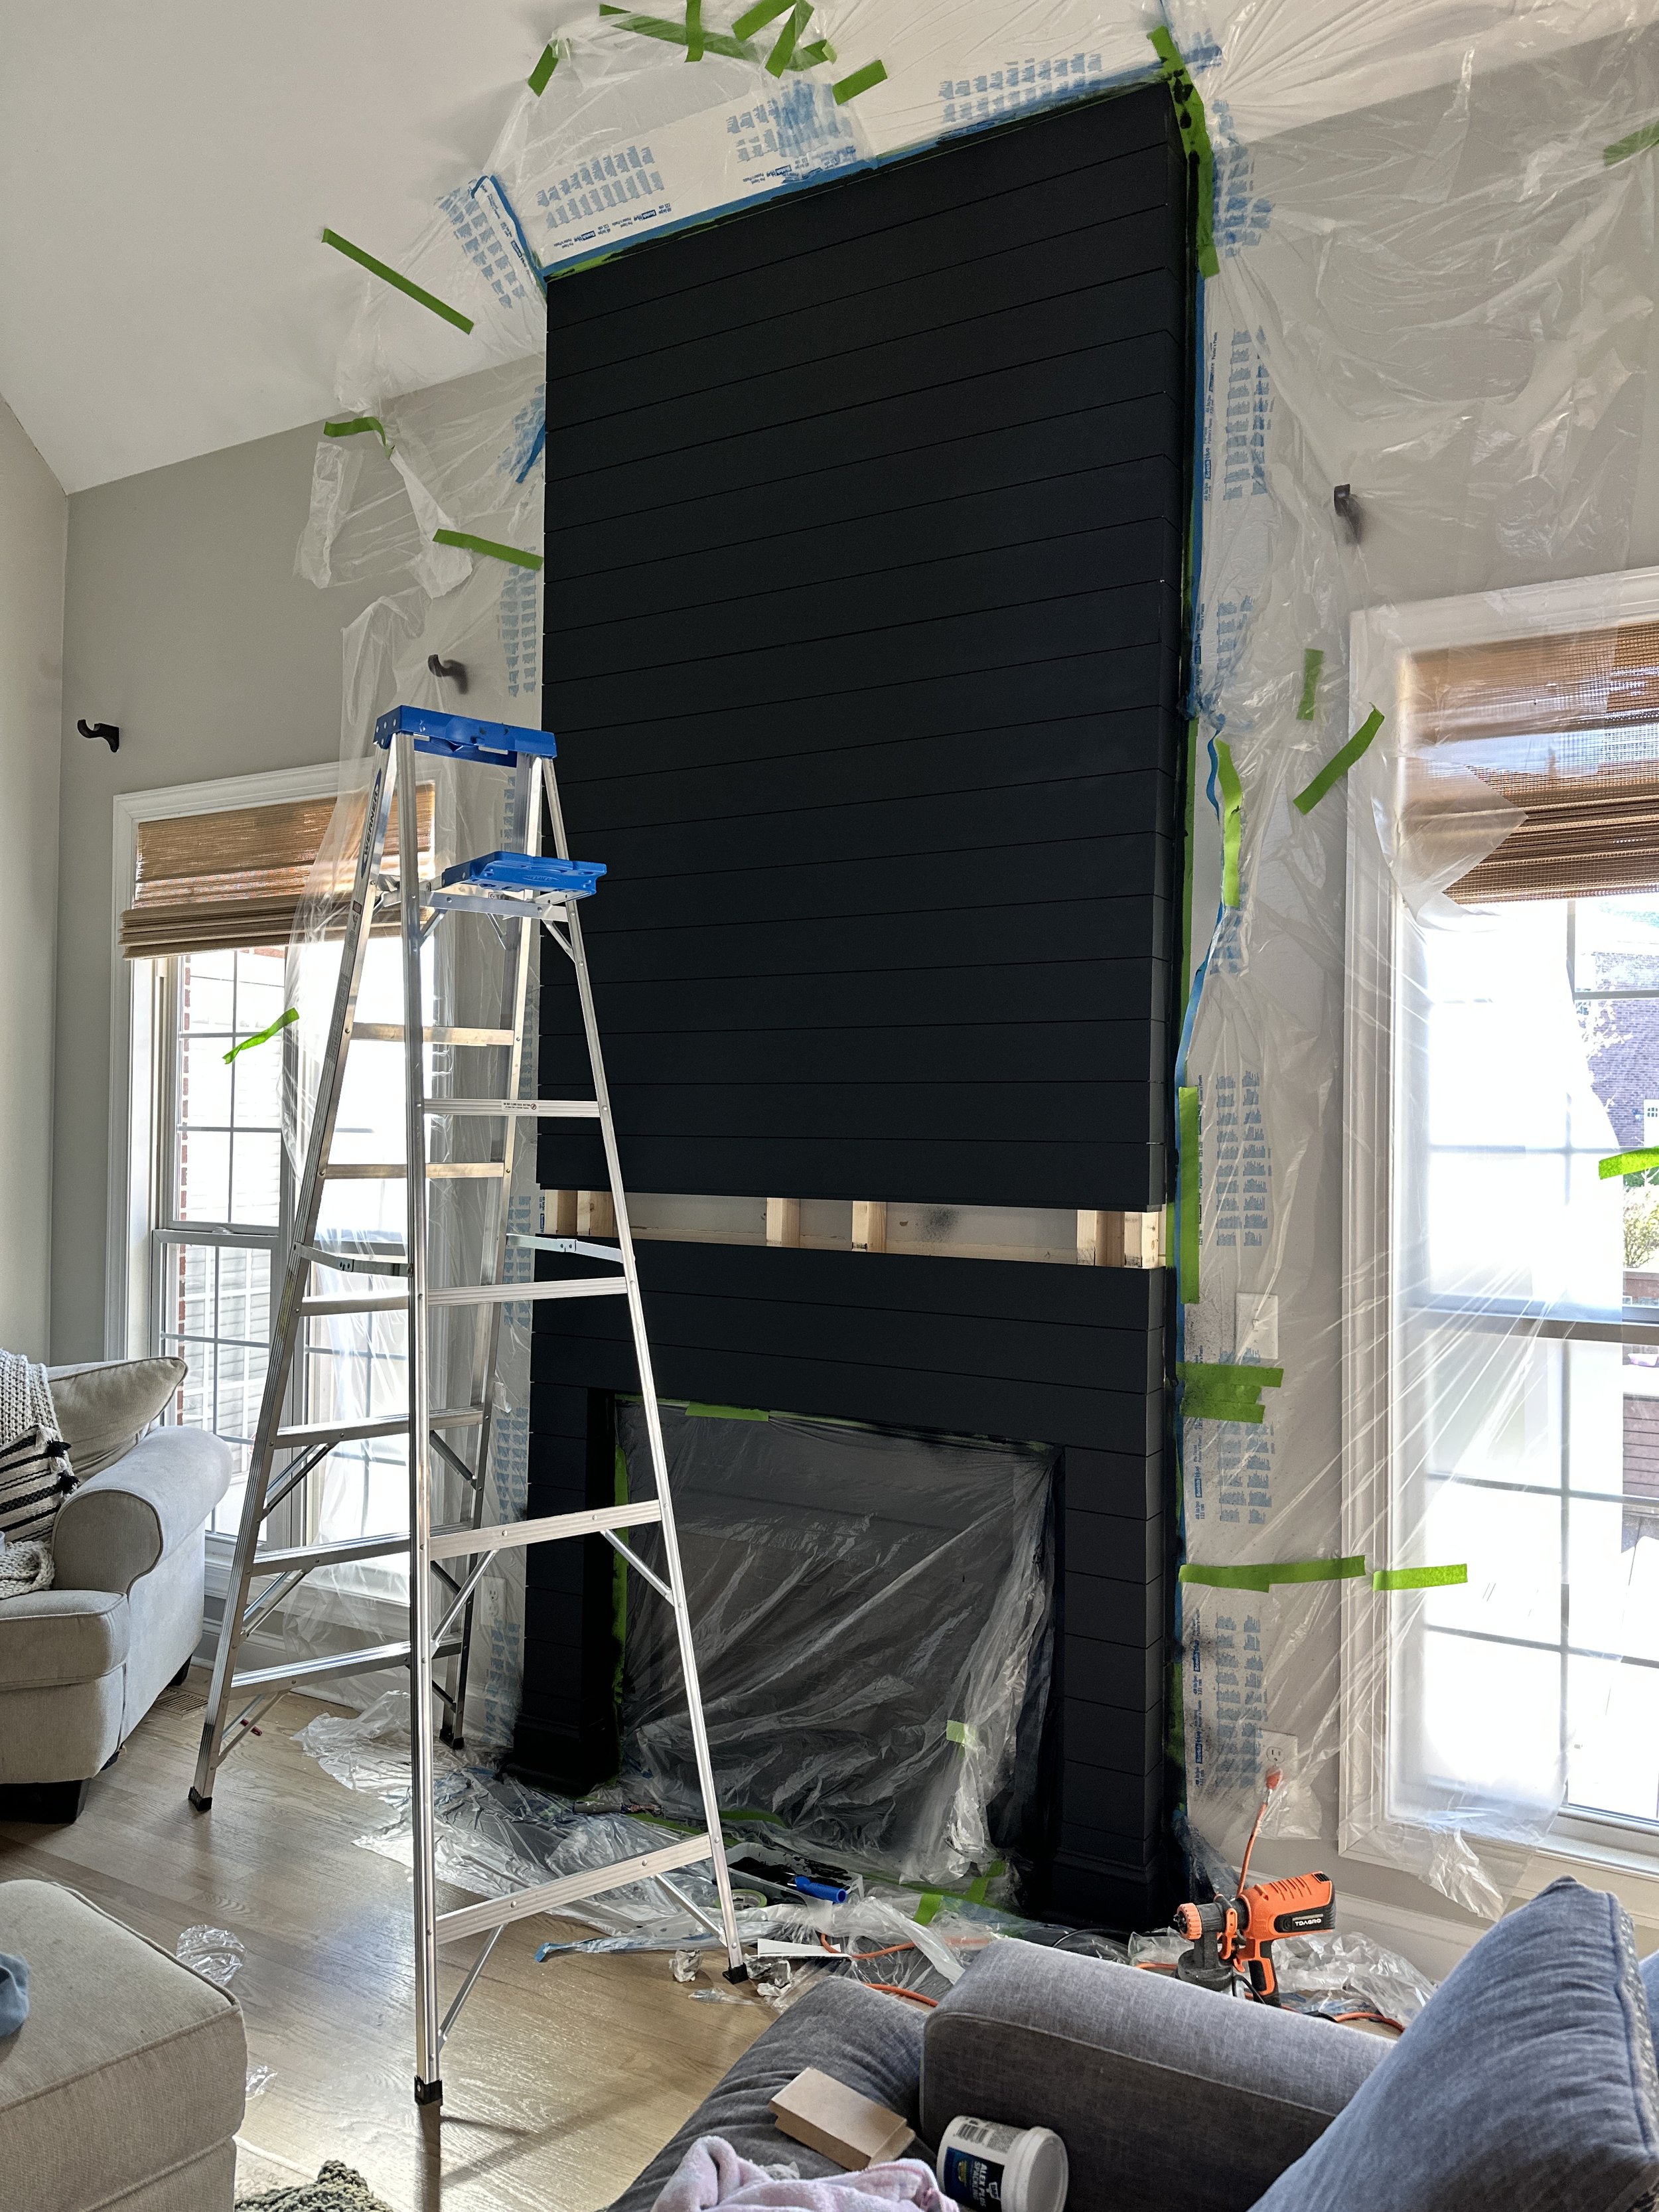
Once the shiplap is installed, fill any gaps between the boards with spackle and caulk the side the meets the wall. Sand the surface to create a smooth finish, and paint or stain the shiplap as desired. You may want to paint the shiplap a contrasting color to the wall for added impact - we painted ours “Tricorn Black” in flat.
I used a paint gun to spray the final coat for a seamless finish. Make sure to prep well with tape if you take this route
Add any trim or molding to the bottom of the fireplace if you want to match what you currently have. I painted the trim on my fireplace the same color as the shiplap.
Step 6: Installing the Mantle
Adding a wood block mantle can be a great way to add some character to your fireplace. You can purchase wood from your local hardware store, however, I do recommend going to a local lumber store/warehouse, as they will have more options to choose from. I was able to find mine at a local lumber warehouse and they cut it down to size for me. Once you have your wood of choice, you will want to do the following:
Sand, stain, or paint. I started by staining mine, but did not like the overall color, so I striped back down to its natural color and finished it off with a poly coat.

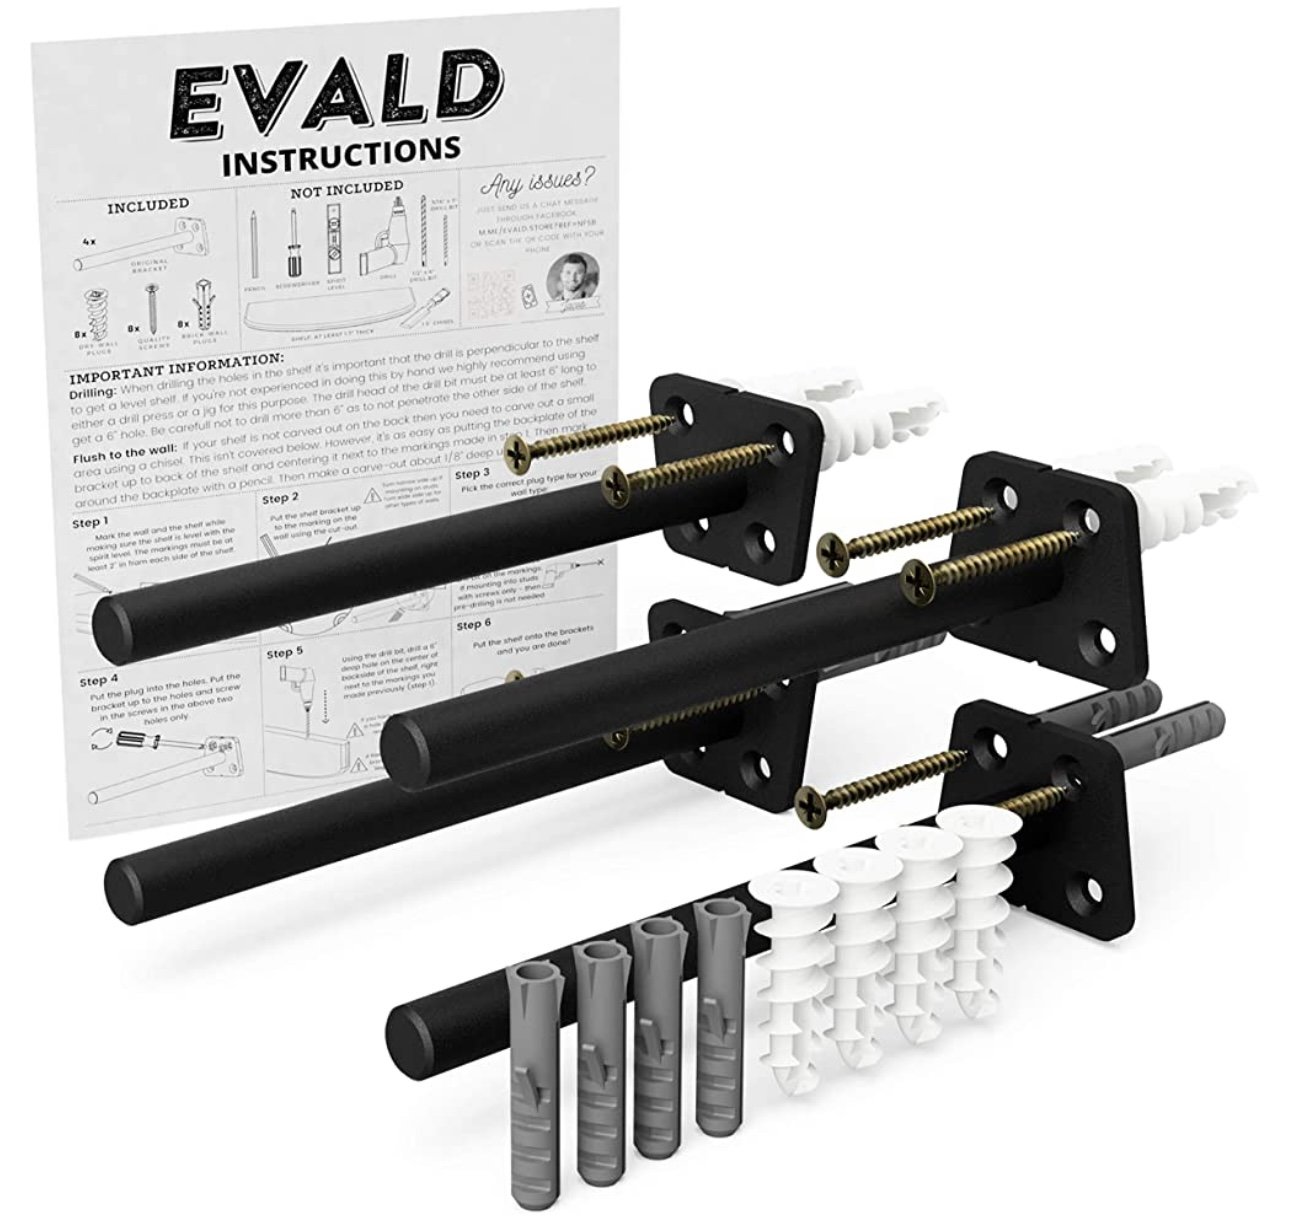
Once the mantle is finished, you will want to install your brackets to hang the mantle. I went with hidden ones that are installed directly on the studs.
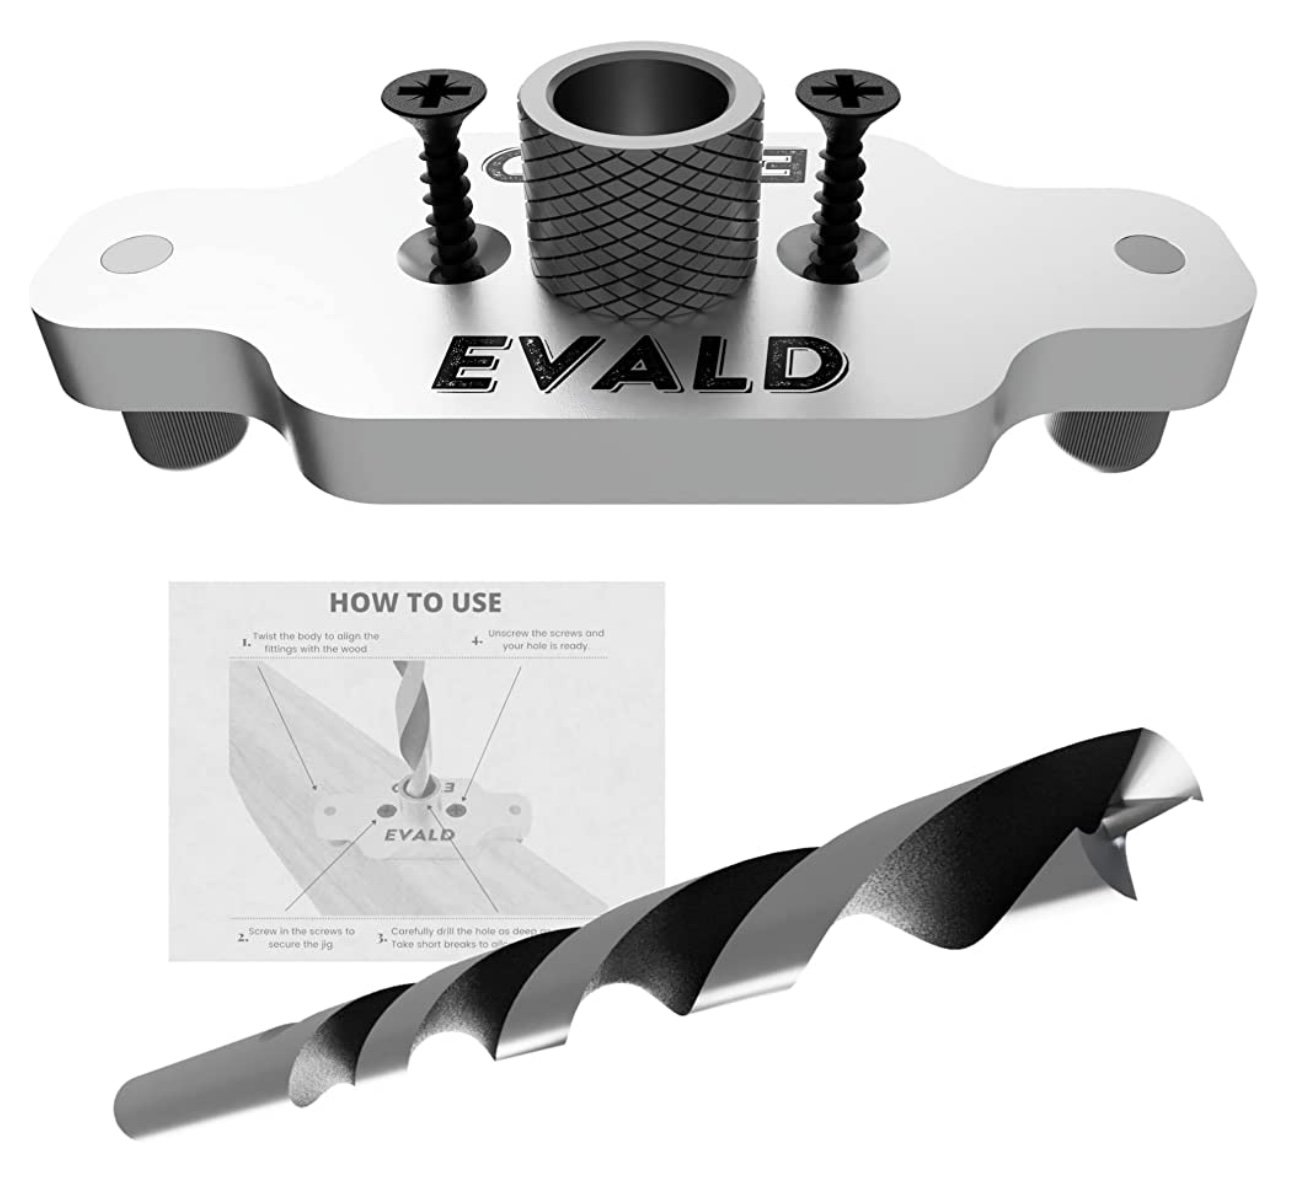
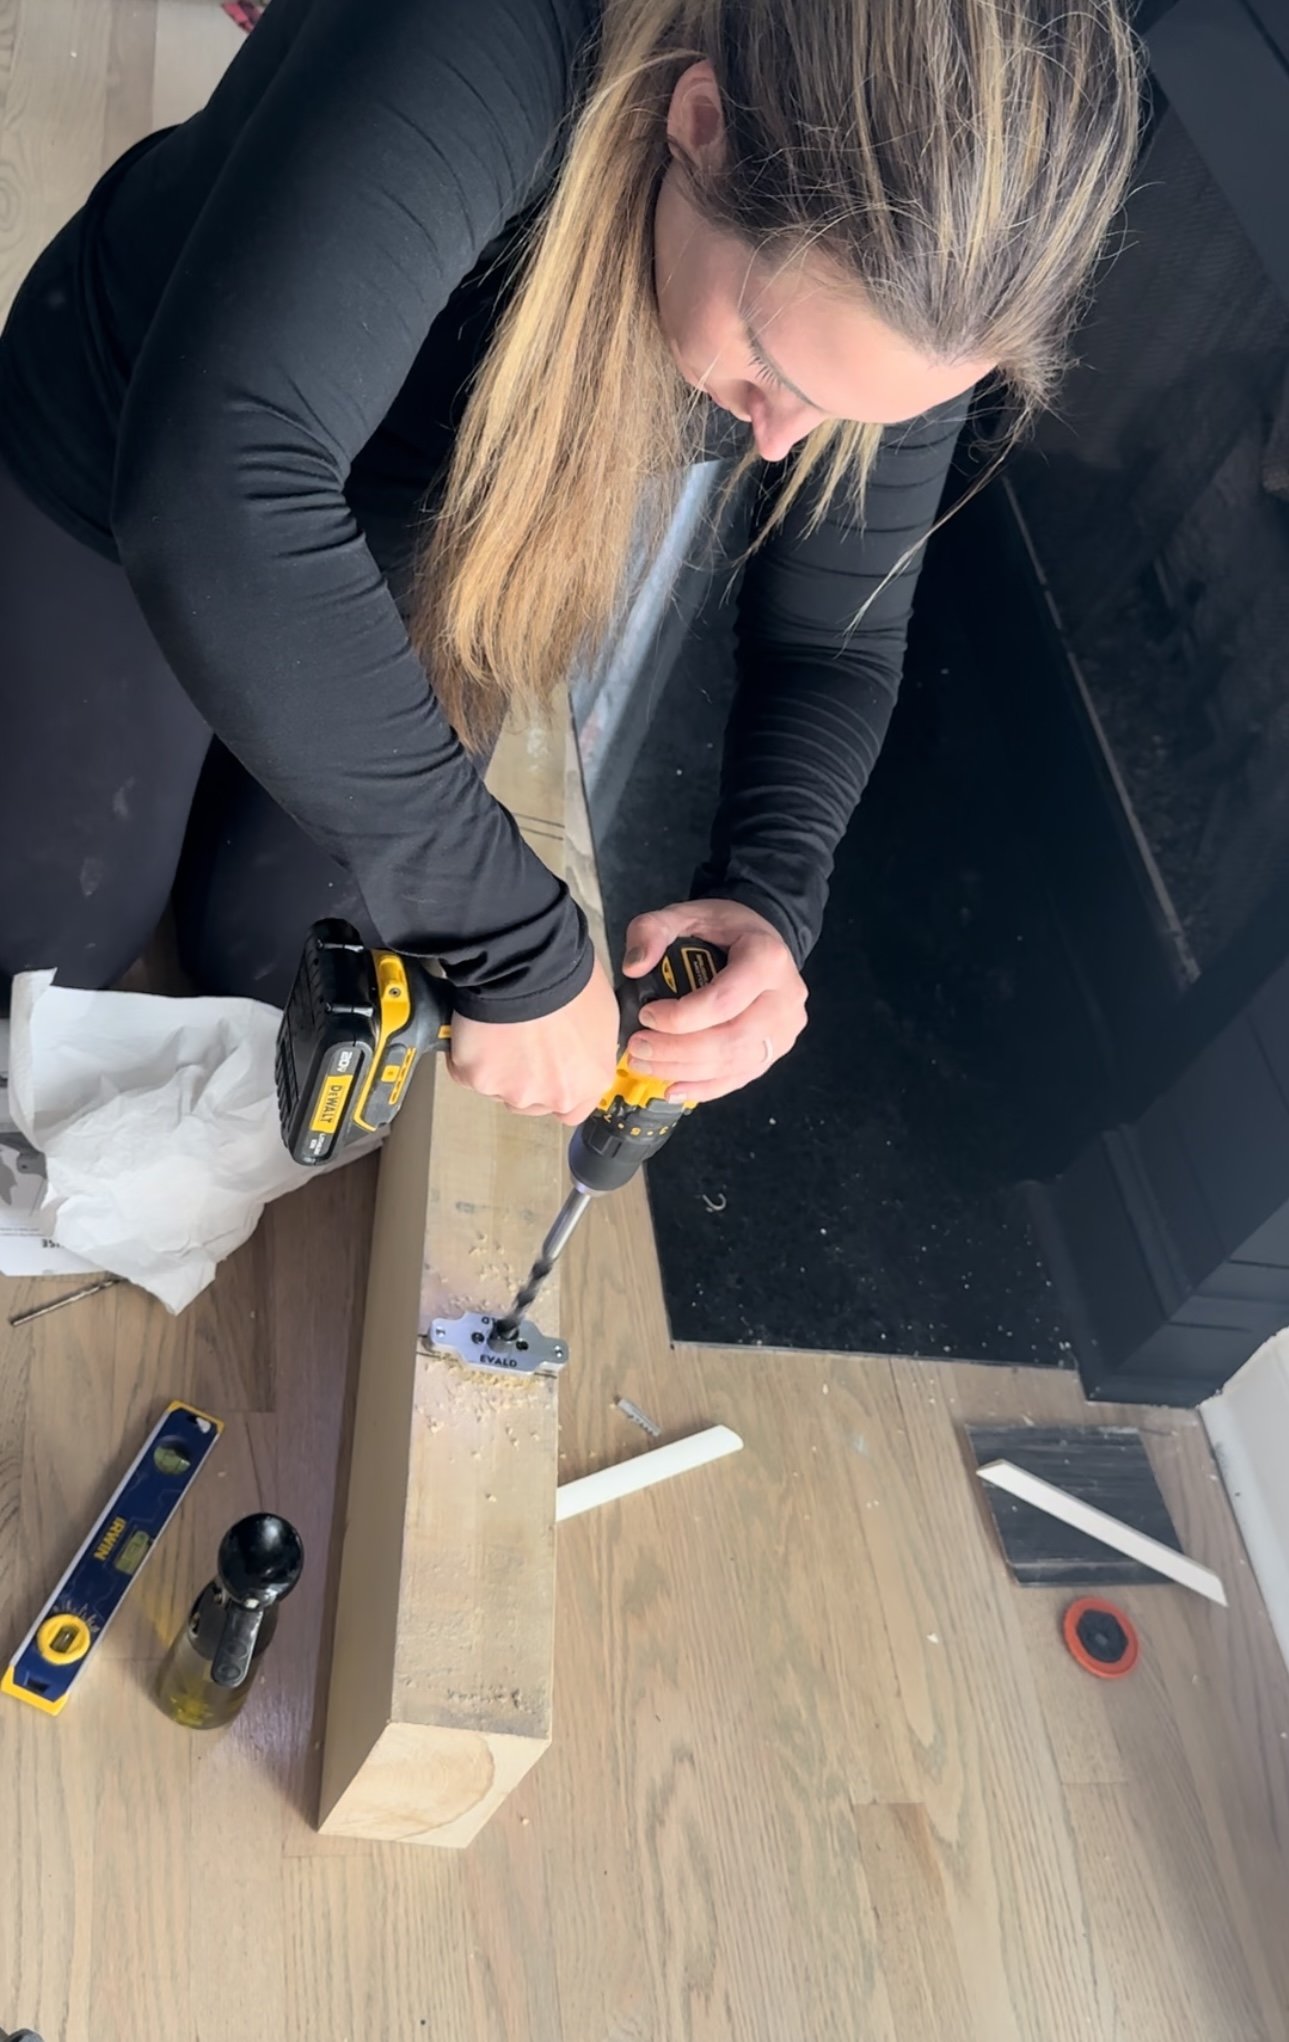
If you go this route, I highly recommend also purchasing the jig and screw bit for it - this will help you get perfect holes in your mantle, so that you can hang level.
Measure and line the brackets up evenly across and install directly into the studs.
Next, you will want to drill the holes into your mantle. Make sure you measure the distance from top to bottom to match what where you installed the brackets.
Once your holes are drilled, line the mantle up and push into brackets to hang. You will likely need a second set of hands to help with this part depending on how heavy your mantle is.
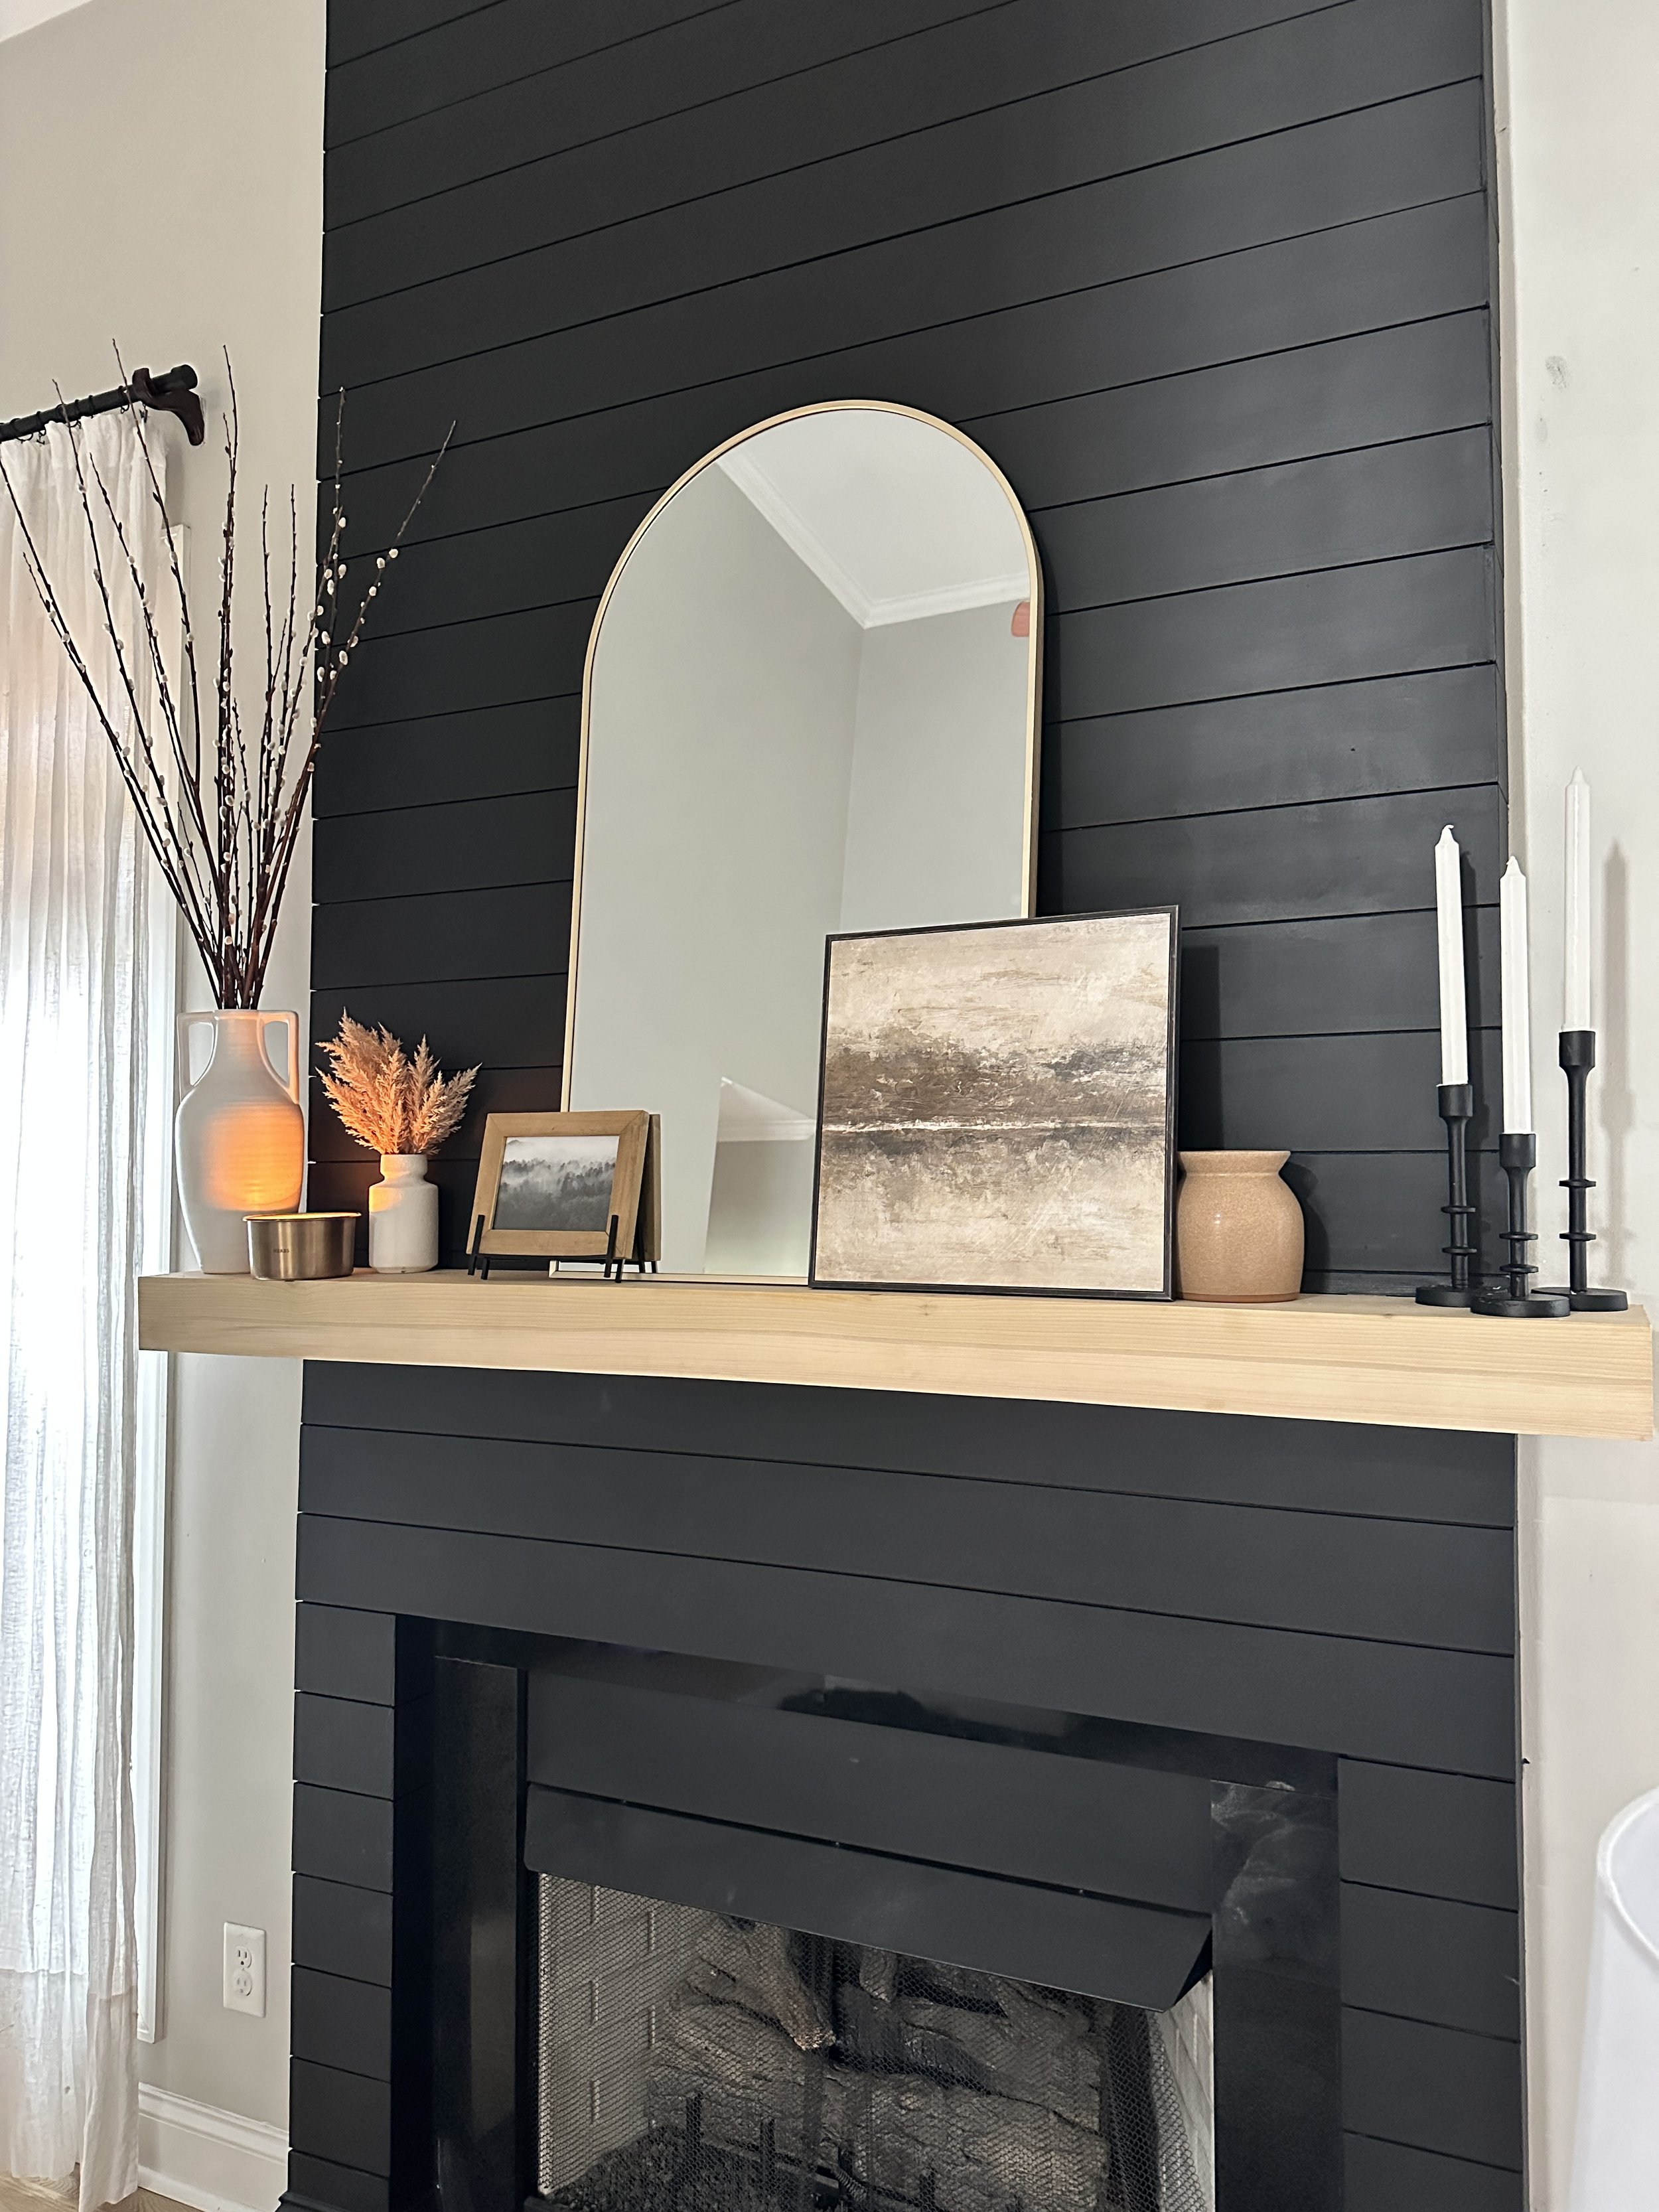
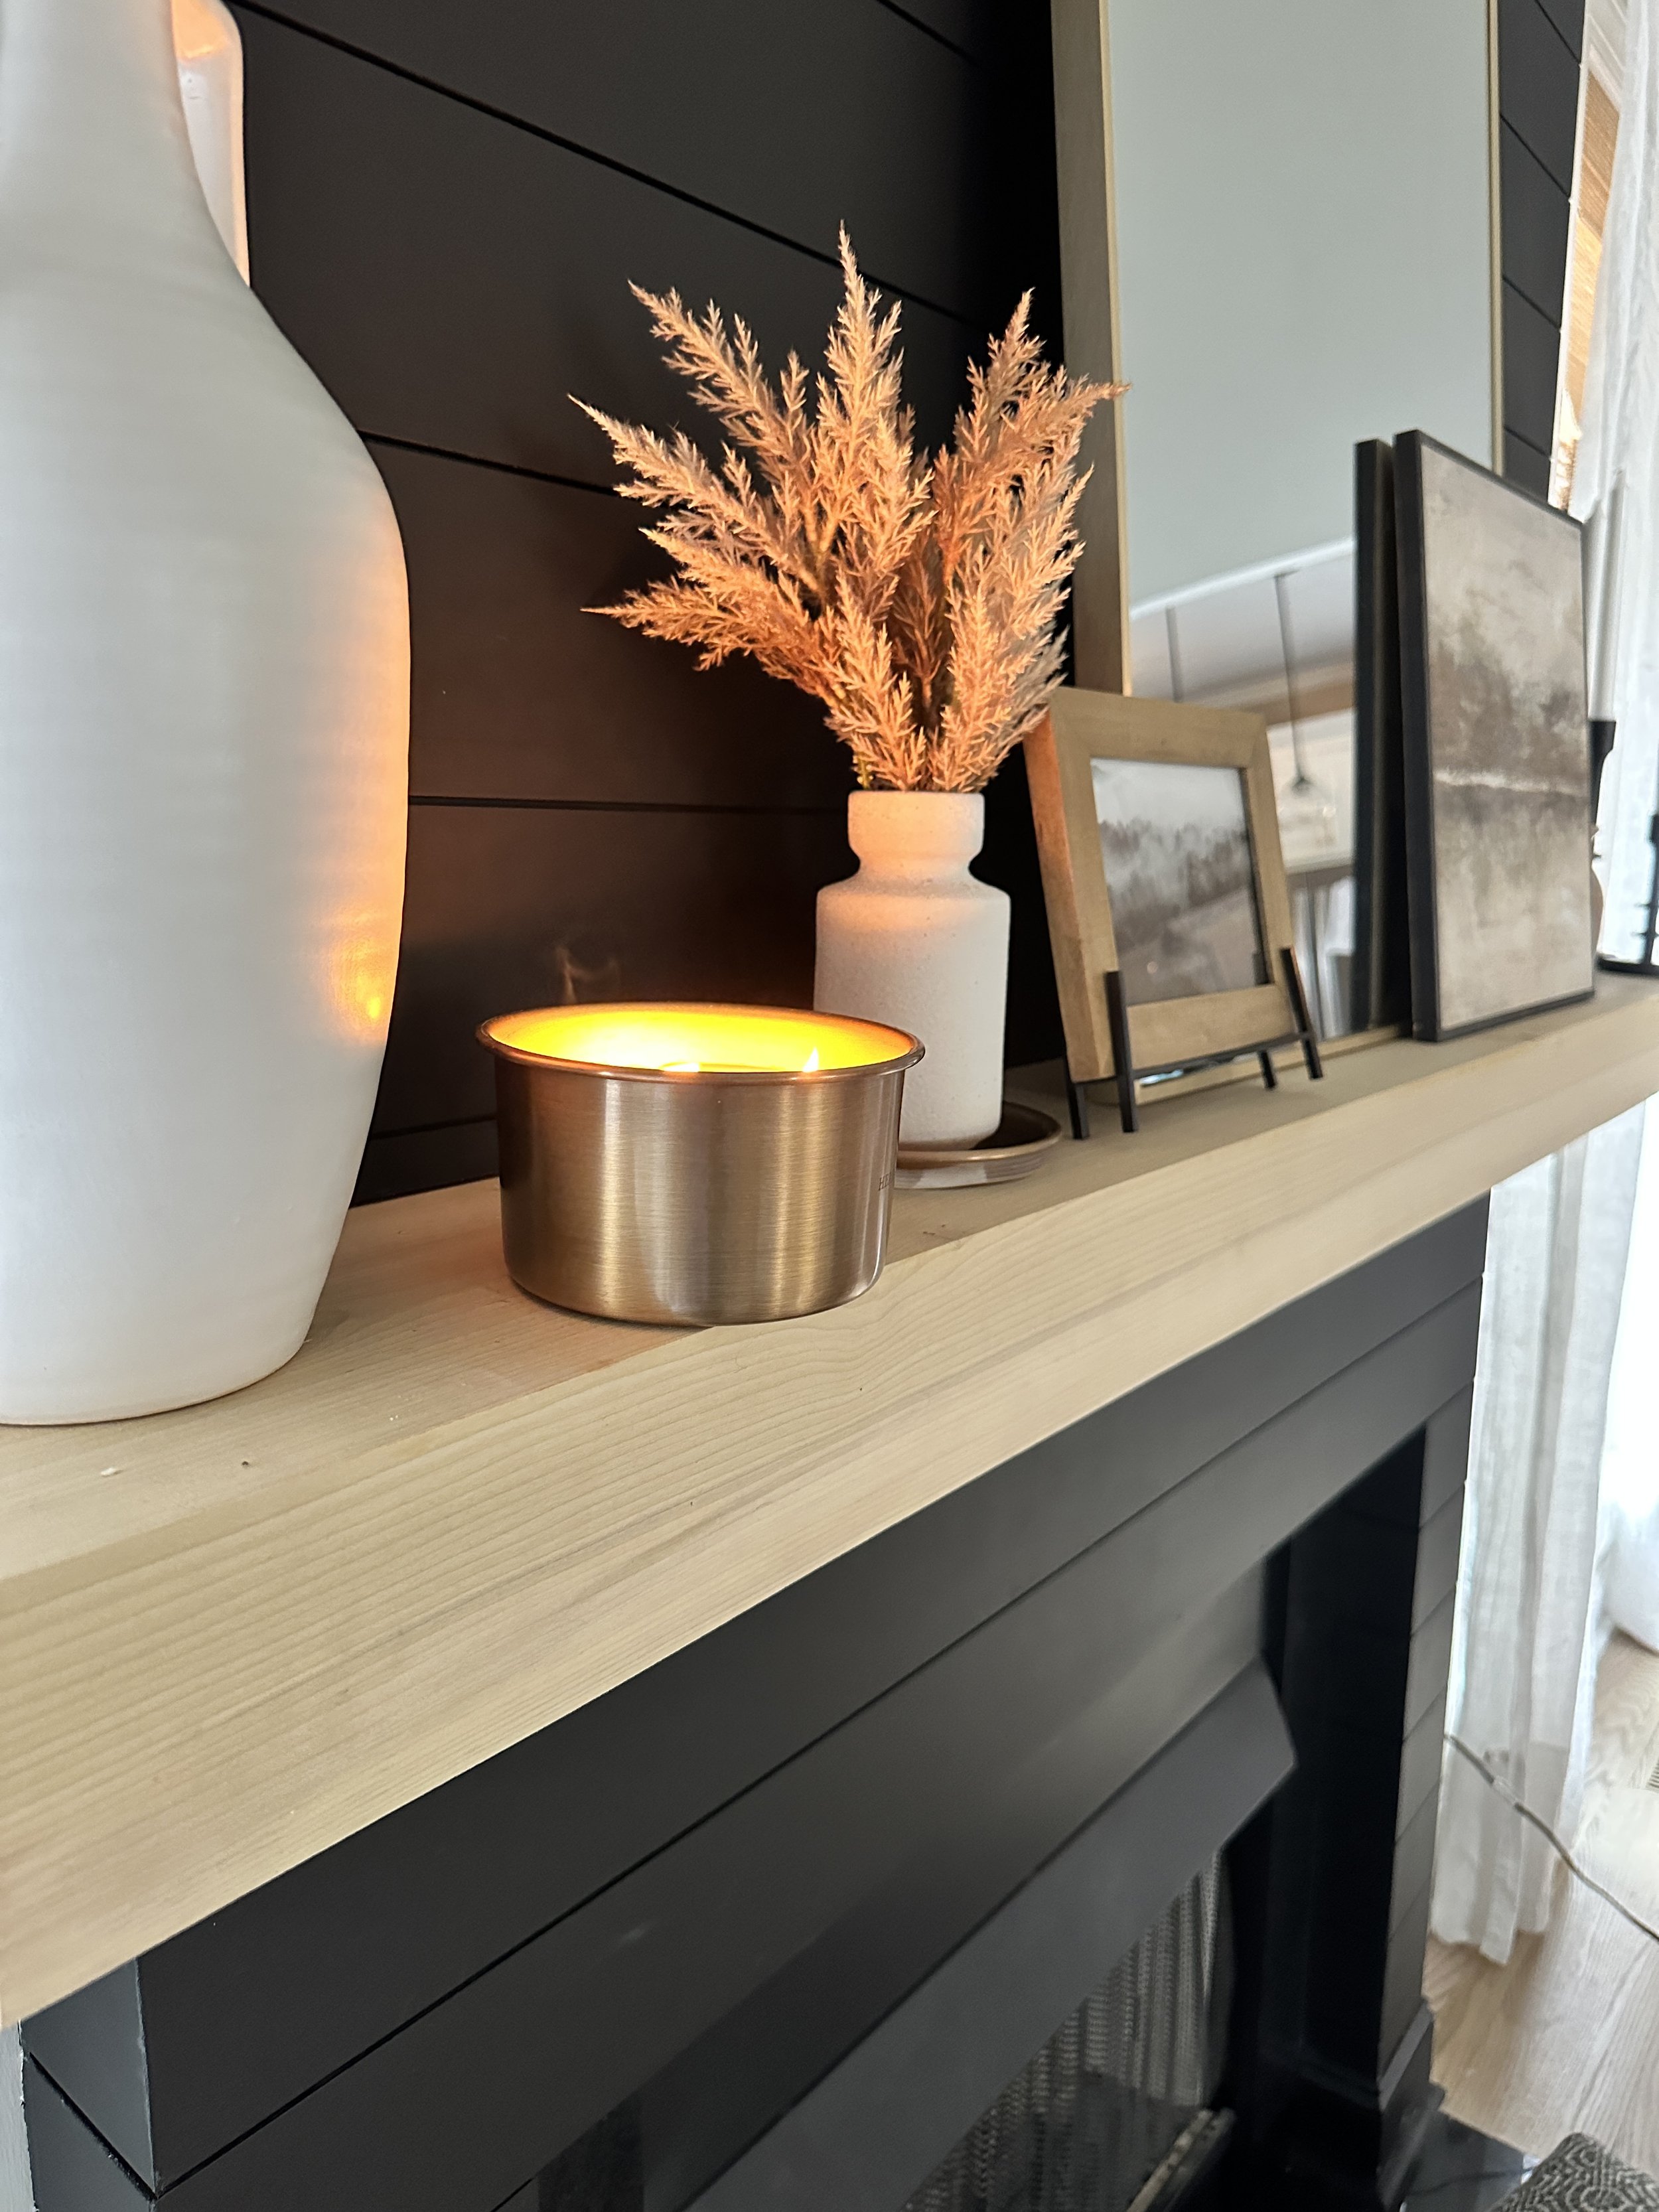
Once the mantle is up, you are done! Style to your preference and you have a beautiful new center piece for your room! Overall, a shiplap fireplace is a great way to add cozy and stylish touch to your home. With a little planning and some basic woodworking skills, you can create a beautiful and functional fireplace that will be the centerpiece of your living space.
-Happy DIY’ing-
<3 Kerry
This post may contain affiliate links, which means I’ll receive a commission if you purchase through my links, at no extra cost to you. Please read full disclosure for more information.
You may also be interested in DIY accent wall post here!